Search This Blog

7/31/2010

WWOOFing at Windswept Farms

On Friday, July 23, we woke up to a violent thunderstorm, which happened to be the only day of rain that has hit this area in about two weeks. Of course we had plans and had to be up early. Today we were embarking on our first WWOOFing experience on Amherst Island. Both of us, but more so myself, have  been waiting a long time for this. We set out in the rain and made it to the ferry dock in Millhaven, just east of Napanee before hitting Kingston. The ferry leaves at 30 minutes past the hour and is very punctual. The ride took about 20 minutes across Lake Ontario. On arrival to the island, it was just as Rob had remembered as a kid.


Once we arrived on the North Shore of the island we had about a 10 minute drive to the farm. We passed through the “town” of Stella, which had one General Store and a Blacksmith shop and no other modern elements. We also drove by many old stone churches and gorgeous farmland that is yet to be spoiled by commercial property. From here we turned onto the third concession, which is nothing more than a gravel road that eventually runs right along the coast of Lake Ontario. The views are stunning. We turned down the driveway to Windswept Farm and were pleased to be greeted by Geoff and Bill, the owners of the farm.


They quickly welcomed us into their home and gave us the history of the farm. It has been owned for almost 30 years by Geoff and began as an undeveloped piece of land. Since then he has planted thousands of trees including black walnut, butternut, and ash. He built the farmhouse, a barn, garage and shelter for the cows all on a bare piece of land. He has been friends with Bill for decades and brought him on as a farmer. They have raised several kinds of animals in the past including chickens, ducks, pigs, and cows. This year they have 3 cows, who we named Beef Steak, Sirloin, and Hamburg. They have several types of crops including hay, potatoes, tomatoes, greens, celery, peppers, onions, a variety of root vegetables, cucumbers, and a beautiful  selection of herbs. The potatoes and root vegetables grow right on the shores of Lake Ontario in beach sand which I found fascinating. The field is actually on another gentleman’s land, but Geoff has been growing the  potatoes there for years so the family has allowed him to keep the patch. In the rear of the farm, they are working to develop a series of grape vines to eventually make their own wine. The barn is home to a  woodshop and several freezers containing last year’s catch. Beside all of this are hundreds of hay barrels which are stacked to the ceiling. In the yard, a pond has been created for ducks when they are around, and a mobile chicken coop for years when they farm chickens. You can also find several greenhouses so that some vegetables can begin to grow a little earlier. All in all, the property is laid out in such a way that it exerts a feeling of splendor deep inside the soul. It is amazing to be completely surrounded by life in all stages.


After the tour, we went back inside and waited for the sun to come out. We chatted about our backgrounds and learned about Bill and Geoff. Bill just celebrated his 82nd birthday and has had a variety of careers over the years. Now he takes care of the crops, enjoys creating things in his woodshop, and maintains the upkeep of the house. His philosophy on life is “It is better to wear out than rust out,” which explains why he is always knee deep in some sort of project. At least he has his golf cart to help him get around the farm easier! Geoff is the owner of the farm and lives on the North Shore with his wife Jocelyn. He comes over daily and helps to care for the crops with Bill. His wife Jocelyn maintains the herb garden and sells some of the greens to a variety of restaurants in Kingston. She visits a few times a week. There are quite a few others who visit the farm frequently who we met during our week stay there. Joe is a contractor from Kingston who helps Bill and Geoff out with building repairs and helped to design the greenhouses. He also creates stuff in the wood shop. Almando is a blind man who uses the wood shop once a week and is learning how to make  homemade cheese, kindly allowing his friends to be his guinea pigs. Doug comes over during the week to help around the farm and in return Bill and Geoff grow some food for Doug’s pigs. It was so interesting to watch a mini community work so well together. They all contribute different skills and at the end of the day everything gets done with plenty of time to enjoy the beauty of the countryside and each other’s company.


During our stay we had a variety of jobs, none of which had any deadlines. The pace of life here was very relaxed. You do what you can and there is always tomorrow. In the mornings, we helped Bill in the woodshop with small sanding projects and learned how to use a variety of tools. During the afternoons, we made our way to one of the various gardens and weeded, harvested, staked, or planted. In the evenings, we prepared many of the meals and enjoyed them on the porch taking in the sounds of the country and watching the sun go to rest. There were several odd jobs completed during the week, such as wiring electricity, adding trim to the greenhouse, cleaning, and taking trips to the dump after cleaning out the barn. In between jobs, we would meet on the porch with a glass of wine or a cold beer and tell stories before getting back to work. The whole lifestyle was almost like a step back in time. There were no sounds of the city heard in the distance, no tall buildings to spoil the view, no television. The whole atmosphere on the farm is one that I long for.


Our stay was not just work, we had time to explore. One day we took a drove around the island and Bill gave us a map and historical guide of the island to point out places of interest. Most of the farmhouses on the island were built in the 1800’s and many of which are still in their original state. Several houses are lined with stone fences which were created by an Irishman using local rocks from Lake Ontario. There are only a handful of roads since long ago all property was divided so that each piece of property would have access to water. Not much has changed, so it is pretty safe to assume that many of the residents of Amherst Island own a large chunk of land. During our ride, we stopped at one of the only pieces of shoreline that looked to be public. We walked along the shores of the Lake and quickly noticed lots of wildlife including geese, ducks, seagulls, mink, butterflies, and snakes. The water was so clear and blue that we felt like we were standing in the ocean. The views were breathtaking.


Another day while we were harvesting potatoes and pruning the patch, we decided to go for a swim in the Lake. The shoreline in front of the patch was a little rocky, but we heard about a mysterious sand bar that on a calm, shallow day, can take you all the way out across Lake Ontario to neighboring Nut Island. We searched for the sand and after about a 5 minute hike we found it. The water was so cool and calm, the perfect remedy for a hard day’s work. It was so neat to be standing in the middle of the Lake with land on both sides of us watching the birds fly above us. On our way back to the potatoes, we came across a nest of killdeer eggs on the sand and a frog camouflaging in the grass. We drove back to the farm in Bill’s truck with a whole heap of potatoes that we dug up, both red potatoes and fingerling potatoes.


Bill is a man who is very embracing of other cultures and was very interested in our time spent in South Korea. He also loves to eat. Therefore one afternoon he sent us into Kingston and asked us to visit the Asian Market so that we could buy supplies to cook a Korean meal. He invited about 12 of his friends over for supper. I was eager to comply with his request, obviously because I love to cook! So we took the ferry into Millhaven and continued on to Kingston. It took about a half hour to arrive. There were two Asian marts in town. We picked up the ingredients to make Dwenjeong Chigae, Pork Galbi, and Vietnamese Spring Rolls. We were able to find Samjeong, Kimchi, and Kim which would make our meal complete! While visiting one mart, we had a nice conversation with the shopkeeper about his hometown, My Tho, Vietnam. It was so neat because we visited that town two years ago during our backpacking excursion. What a small world! After our trip to the store, we headed into a small pub to grab some lunch before heading back to the island. The Korean dinner was not for another two days but since there is no grocery store on the island it is best to prepare in advance. The night of the dinner arrived quickly and two hours before the guests were expected to arrive, the power on the island went out leaving the house in complete darkness. I didn’t panic, but I did begin to get a little concerned about how I was going to cook for 12 people arriving in less than 2 hours. Bill and Joe came to the rescue and fired up the backup stove which was powered by propane. We used this to cook the meat. Since the burners in the house were all propane as well, it turned out to be a success. 7:00 arrived and only one guest came, so the dinner I prepared for 12 was eaten by 5, with enough leftovers to feed Bill for a month! The dinner turned out well and everyone seemed to be happy with the food prepared, although it is hard to replicate true Korean cuisine after eating so many dishes traditionally prepared.


Our stay at the farm was coming to an end and we both started to get a little sad. Over the past week we have been surrounded by wonderful hospitality, great conversations, good food, and amazing people. As we drove back to the city, we already missed the sounds of the birds, the peace and quiet, the bright blue skies, being surrounded by life in all directions, the moo of the cows, and the chatter of old friends. We couldn’t have asked for a better experience and are eager to plan our next trip to Windswept Farms and Amherst Island.

7/21/2010

Relish and Bread and ZUCCHINI oh my!

Our zucchini is growing like whoa! Rob’s parents brought over a 4 pound zucchini and I thought it was the largest one I’ve ever seen until I went to pick today and brought one home that is the size of a baseball bat, but shaped a little more like a Fred Flinstone bat. My plan was to make Zucchini Brownies but since our veggies were delivered with a tray of brownies, I opted for something different. I made 4 loaves of my fav Chocolate Chip Zucchini Bread because it is so easy to make, eggless, and freezes so well. I like to have some on hand so when we go to visit people we can bring something. I am always prepared for last minute gatherings!


After making the bread there was still an enormous amount of it left. So I put on my thinking cap and browsed through my seasonal bible, The Joy of Pickling, and found a husband pleaser of a recipe… Zucchini Relish. I am not really a fan of the stuff but since men seem to love the stuff I got to chopping. The recipe sounded pretty easy, but was very time consuming.

Now the recipe didn’t call for hot peppers but since I have a huge plant of about 100 habaneros on my porch, I added some heat to the relish. Another recipe in the book recommended wearing gloves when cutting peppers but I thought.. nah I’ve cut so many peppers before and never had any problem with chili oils burning me. Well let me tell you that today my hands were not invincible to the oils and burned for about 12 hours after the fact.

Just when I thought I was done chopping, I had another vegetable to chop into a mince. But as soon as I put it on a simmer and took a taste, I became an immediate relish fan. The cinnamon and the ginger came together brilliantly with peppers and the zucchini. The combination of sweet, spice, and heat was amazing. I would highly recommend this recipe if you love relish or if you have a surplus of zucchini in your garden.

By the way, after 4 loaves of bread and 4 jars of relish the zucchini wasn’t gone. We grilled it on the ole barby for supper. Now onto the other 3 in my fridge. Thus is the beginning of the zucchini!


Zucchini Relish
Recipe From: The Joy of Pickling
Yield; 3.5 pints


Ingredients:
4 cups (1.75 pounds) coarsely ground or chopped zucchini
1 1/2 cups (about 1/2 pound) coarsely ground or chopped onion
1 1/2 cups (2-3 large) coarsely ground or chopped sweet red peppers
1 1/2 TBS pickling salt
3/4 cup sugar
1 3/4 cups cider vinegar
1 tsp whole celery seeds
1 tsp whole yellow mustard seeds
7 thin slices fresh ginger
7 one inch sticks cinnamon


Directions:
1. In a large bowl, mix the zucchini, onions, peppers, and salt. Cover the vegetables with cold water. Let them stand at room temperature for 2 hours.

2. Drain the vegetables. Rinse them and drain them again.

3. In a non reactive pot, bring to a boil the sugar, vinegar, celery seeds, and mustard seeds, stirring to dissolve the sugar. Add the vegetables and bring them to a boil. Reduce the heat. Simmer the vegetables for 10 minutes.

4. While the vegetables simmer, divide the ginger and cinnamon among the pint or half- pitn mason jars, allotting one piece of each for each half-pint. Pack the hot relish, allowing 1/2 inch headspace. Close the jars with two-piece caps and process the jars for 10 minutes in a boiling water bath.

5. Store the cooled jars in a cool, dry, dark, place.


Eggless Zucchini Bread
Recipe From: Recipezzar
Yields: 2 loaves or 4 mini loaves


Ingredients:
2 cups sugar
3/4 cup vegetable oil
3 cups flour, sifted
2 cups zucchini (shredded or tossed lightly through blender..chopped VERY small)
2 1/4 teaspoons vanilla
3/4 cup low-fat vanilla yogurt
1 1/2 teaspoons baking powder
1 teaspoon baking soda
1 teaspoon salt
2 1/4 teaspoons cinnamon
3/4 teaspoon nutmeg
1/2 cup chocolate chips


Directions:
1. Preheat oven to 350 degrees, and grease ONLY the bottoms of two loaf pans.

2. Measure yogurt into a medium sized mixing bowl. Add sugar and blend until creamy and slightly thick approx 2-3 minute.

3. Add oil and blend through.

4. Add zucchini and vanilla and stir until mixed through.

5. Sift flour in a medium bowl and add cinnamon, nutmeg, baking powder& soda, and salt to it.

Add dry ingredients to wet ingredients a little at a time. Fold ingredients into each other just until nicely combined.

6. Stir in chocolate chips.

7. Pour'batter' into loaf pans, and put into oven. Bake for 1 hour (60 minutes) and check to see if it is done (knife poked through center should come clean when done). If it is not done, continue to bake for additional time.  It could take between an hour and an hour and a half to bake completely.

7/14/2010

We've got Smurf Food People

My mother in-law called me the other day to tell me that the garden is going crazy with beans and that we should come over to pick some. I thought to myself, I just picked a few pounds on Saturday and we have been eating beans at every meal ever since. So we went over to check out the beans and could not believe how many there were. This plant totally wowed me- it was growing out of control. I was starting to believe that the story Jack and the Bean Stalk was true. There is no way to get ahead of picking them all. When we planted, we didn’t realize that the best thing with beans is to sporadically plant them so they don’t all come at once… oops! Live and learn right.


So we picked another huge basket full of green snap beans and yellow wax beans. We brought them home and decided to bite the bullet and have a night of pickling. I paged through my recipes and found a good one for Spicy Pickled Beans. I gathered all of my ingredients and employed my bean cutter…aka my husband to trim the beans and cut them into one inch lengths. While he was doing this I washed all of the jars and lids and placed them in a pot of hot water, not boiling.

From here, I blanched the beans in boiling water for a few minutes. At the same time I prepared a pickling solution of white vinegar, sugar, pickling salt, dill seed, and sliced habanero peppers. Once the beans were cooked, but still tender, I added them along with the water they boiled in, into the pickling solution to simmer for 15 minutes. I put the cover on and stirred occasionally. After the time was up, we set up an assembly line for filling the jars. With a slotted spoon, I put the beans into the jar and added a few slices of garlic. Then I added the hot pickling solution to the jar leaving about 1/8 inch headspace. It is important to keep the pickling solution over the heat until all jars are filled so that it doesn’t get too cold to put in the jars. Then the jar was transported using our handy canning jar lifter, to the countertop where Rob delivered a seal and screw lid. I removed the air bubbles with a bamboo stick before putting on the lid. I secured the top and placed the jar upside down on the counter. Then we continued this process for each jar. Since we doubled the recipe, it made 5 500mL jars. We left them inverted over night. In the morning we checked to make sure they all sealed properly, meaning that the top will not move when you touch it. We moved them to a cool, dark place to rest. They will be ready to eat in a few weeks.


Pickled Snap Beans
Recipe From: Ifoodtv.com
Yield: 3 500 mL jars

Ingredients:
3 pounds tender snap beans
1 1/2 cups water
1 1/2 cups white or cider vinegar
1/2 cup sugar
2 teaspoons salt
3 hot red peppers
1 1/2 teaspoons dried dill seed
5 cloves garlic, coarsely chopped or sliced

Directions:

1. Wash the beans thoroughly and snap off the ends.

2. Cook them in the water until just crisp tender.

3. Meanwhile, simmer covered in a two quart saucepan the vinegar, sugar, salt, red peppers and dill seed.

4. Add the beans with the water in which they were cooked and simmer, covered, fifteen minutes.

5. Continue simmering while packing one sterilized jar after another with the beans.

6. Divide the raw garlic among the jars and pour the vinegar mixture over the beans.

7. Fill the jars to one-eighth inch from the top.

8. Seal at once and store in a cool, dry place.


When I was at the grocery store picking up the vinegar and salt for the beans, I couldn’t help myself to buy a kilo of fresh garlic cloves for another recipe I found for Korean Pickled Garlic. I ate garlic like it was going out of style in Korea and miss it. Besides it is so good for you! So I added some brown rice vinegar to my basket as well.

The recipe that I found for the pickled garlic came from a book called The Joy of Pickling that has dozens of recipes from all over the world. It sounded so easy. So this afternoon I sat down and peeled about 15 heads of garlic! I put the garlic into two jars and covered with brown rice vinegar. Then the recipe said to cover it and leave it at room temperature for a week before adding the rest of the ingredients. In a week I would come back to it and add soy sauce and brown sugar, shake, and keep in the fridge. The garlic would be good for up to a year! My mouth was watering each time I walked by the counter and saw the garlic cloves just swimming in the vinegar solution.

Now the funny part is this. I woke up the next morning to make some coffee and I looked at the garlic on the counter and to me it looked a little discolored. I thought it was just that I was not quite awake yet, but then after a few cups of coffee I looked again. Yep my garlic turned… get this… smurf blue! So I researched it and found out that this is common when preserving garlic. It means that the garlic was picked too early and that there is a high amount of sulfur in the either the solution or the garlic itself and it reacted with any traces of copper in the vinegar. But according to the medical research mentioned in this article it is still fine to eat. (http://www.gourmetgarlicgardens.com/pickle.htm ) To prevent this, the garlic should have been processed at high heat, which my recipe did not call for. If nothing else, I know how to make Smurf Food now!


Mrs. Kim’s Pickled Garlic
Recipe From: The Joy of Pickling by Linda Ziedrich
Yield: 1/2 to 3/4 cup

Ingredients:
3-4 heads of garlic with small to medium sized cloves
1/2- 3/4 cup brown rice vinegar
2-3 TBS brown sugar
2-3 TBS soy sauce

Directions:
1. Separate and peel the garlic cloves. Put them in a jar and cover them with the vinegar. Cap the jar and let it stand at room temperature for 1 week.


2. Pour half of the vinegar out of the jar (you can use it for a dressing a salad, making a sauce, etc.). Add the brown sugar and soy sauce, cap the jar, and shake it to mix the contents and dissolve the sugar. Store it in the refrigerator.

3. The garlic will be ready to eat after 1 week. Refrigerated, it will keep well for at least 1 year.

Smurf Food:


I am a pickling novice, making this my first solo attempt at preserving anything. I have lots to learn and welcome any recipes or suggestions from anyone who is more experienced than myself as I feel that I will have many nights of pickling ahead of me. All in all it went pretty well beside the blue garlic. I will keep these jars of garlic and get a good laugh anytime I open my fridge.

Since this blog is about preserving food, I might as well share our Strawberry Jam making experience. I bought a ton of strawberries at the store the other day and just thought, maybe I will whip up some jam. I have never made jam before nor have I ever seen anyone make jam. All I knew is that you need pectin, fruit, jars, sugar, and probably some sort of juice. So I got all of those things. I opened the box of pectin hoping there was a recipe and sure enough there was…lots of steps but only a few ingredients. As I was perusing the recipe, I had to look through the phone book and get the number of the local dentist handy as this recipe called for 7 cups of sugar to 5 cups of strawberries…oh my!

So we improvised a bit for the tools needed, so hopefully the jam turns out. We didn’t have a canner or a canner rack, so we just used the biggest pot we had. The first step was to wash and cut the berries. I filled my sink with cold water and let them soak for about 10 minutes before cutting. Rob was the strawberry cutter. Meanwhile, I washed the jars/lids and put them in a pot of hit, not boiling water, to sterilize. Once the berries were but I pulsed them in the blender to crush them. Then I made a mixture of berries, pectin, and lemon juice and heated this to a boil before adding 7 cups of sugar. We continued to stir the mixture and brought it back up to a roiling boil and tried to keep it in the pot. Some went overboard, so one of us stirred while the other one waved the smoke out the door to prevent the smoke alarm from going off! Jam gets sticky and smoky fast when burnt! We began to fill the jars and spilled more jam everywhere…on the cabinets, burners, in the sink, you name it jam was there. What a story to tell about our first jam making experience…haha! We were still able to fill 7 jars of jam! Hope it all works out.

Note: It is best to read the pamphlet that comes with the jam jars to get all of the details for the recipe. It comes with lots of handy tips! Happy Jammin!


Strawberry Jam
Recipe From: Bernardin
Yields: 7-8 250 mL jars (depending on how much you spill ;)

Ingredients:
5 cups crushed strawberries
1/4 cup lemon juice
1 pkg Original Pectin
7 cups sugar
1/2 tsp butter
8 250 mL jars

Directions:
1. Prepare canner, jars and lids in hot water bath.
2. In large stainless steel sauce pan, stir together prepared fruit, lemon juice, butter (to reduce foaming), and Pectin, until dissolved.
3. Over high heat, bring mixture to a rolling boil.
4. Add all of the sugar, stirring constantly, and return mixture to a rolling boil that cannot be stirred down. Boil hard for 1 minute. Remove from heat, skim off any foam if necessary.
5. Fill and process jars according to Bernardin directions.


7/13/2010

Summer Celebrations

This weekend has been full of events so that means tons of cooking for me! The only downfall was the extreme heat, so no oven for me! Friday marked the one year anniversary of my marriage to Rob so we celebrated at home since last weekend we went back to the place where we got married and had dinner and went to a show. Besides it was raining and we have drove over 1300 miles in the past two weeks. Neither of us wanted to sit inside a car.


I wanted to prepare something special so I thought about all of the traveling we have done as well as all of the international cuisine that we try to imitate at home. Immediately I had flashbacks of the time we spent in Cambodia at the cooking school, Smokin Pot. (Yes that is really the name of restaurant/ cooking school!) We took a one day course and learned how to make some of the most fabulous food. Our ultimate favorite was Beef Laap. We came across variations of this dish in Thailand, Cambodia, and Laos. We decided to make it using the recipe from the Smokin Pot Cookbook, but enjoy it Laoation style… with our hands! Alongside of the Laap, we had a plate of olives, greens from the garden topped with olive oil and balsalmic, and black olive basil hummus. The two dishes don’t really go together but it didn’t matter today because they both bring make so many great memories.

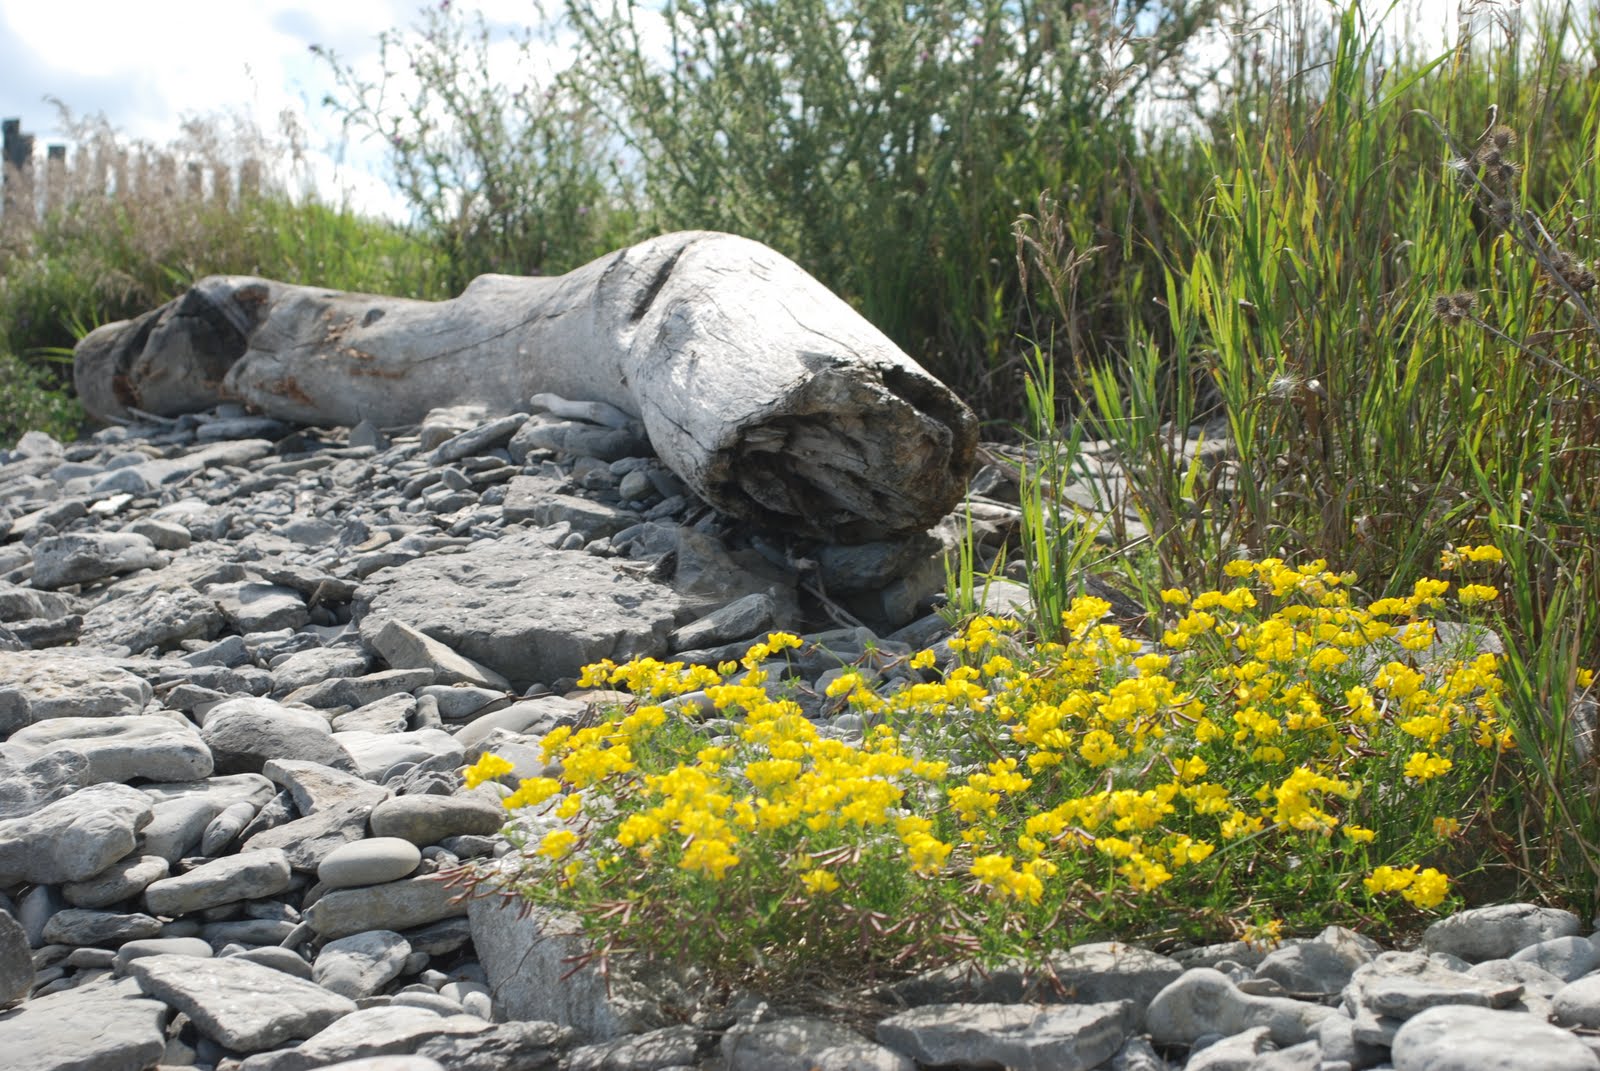
I made the hummus first so that it could chill in the refrigerator while I prepared the Laap. I used the blender today to make it since I couldn’t be bothered with standing on top of chair rearranging everything in the cupboard to get the food processor out… ok so I have too much stuff in my kitchen cupboards or maybe I just don’t have enough cupboards. I prefer to say the later! So I rinsed a tin of white beans and put them in the blender, followed a few tablespoons of lemon juice (the fresh ones in the store looked like someone beat them up so I went for the bottled juice), a splash of olive oil, a handful of black olives, salt and pepper, fresh basil from the garden, and finally some red pepper flakes. I pureed this for just a few seconds because I like hummus a little bit lumpy. The taste of the fresh basil was amazing! Who can go wrong with basil and even better olives! Since I have this family of ants who won’t leave my basil alone leaving holes on just about every leaf, this is a perfect recipe to us the basil for because it gets finely chopped in the blender. When I make this again I think I would add some roasted red peppers to kick up the flavor a bit. But all it all it was very refreshing for a hot summer day!


Black Olive Hummus with Basil
Recipe Created by: Gretchen Brown
Servings: Depends on how many dips you make

Ingredients:

1 can white beans or chickpeas, drained and rinsed
Juice of 1 lemon or 1-2 TBS of lemon juice
1 TBS olive oil (add more depending on the consistency you prefer)
Salt and pepper
1 tsp red pepper flakes (or more depending on your liking)
10-12 black olives
5-6 fresh basil leaves

Directions:
1. Rinse and drain the beans. Place in a blender or food processor.
2. Roughly chop the basil and olives and put in the blender.
3. Add all of the other ingredients and pulse until pureed, adding more lemon juice or olive oil depending on the consistency you prefer.
4. Serve topped with feta cheese, marinated olives, and mixed greens.


In Lao, Laap is traditionally prepared with white sticky rice. This type of rice is very dry, yet sticky, making it very easy to roll it up into a ball to pick up your food. You got it, no chopsticks… just your fingers! Sticky rice is not popular in Canada for many reasons so I just used long grain brown rice as a substitute. After having the authentic sticky rice in Lao, I know that brown rice is far from a substitute. It is like saying make Pad Thai with spaghetti noodles.

I started the rice at the same time I was preparing the hummus since it takes nearly an hour to make.
Then in a non-stick skillet, I cooked the beef on a low setting with some lemon and salt and pepper. After a few minutes, I added the garlic, fish sauce, sugar, red pepper flakes, chopped pepper, chili peppers. Once the meat was cooked, I turned off the heat and mixed in some chopped fresh mint, of course from our garden! I places some greens on the plate and topped them with the Laap mixture. Rice was served on the side in some pretty spiffy rice bowls/sushi plates from my dear friend Ilana!

We couldn't’ wait to dig in with our hands to enjoy! We set up our table and sat on big pillows on the floor and scooped up some rice. We tried to make the rice into a call like traditional sticky rice, but the brown rice did not cooperate. It made for a messy, but fun, meal as we tried to pick up the ground meat with our hands. The whole meal gave us flashbacks of the lush, green countryside of Lao. Check out the recipe below.


Beef Laap
Recipe From: Smokin Pot Thai/ Cambodian Cooking Cookbook
Serves 2

Ingredients:
Ground Beef for 2 (I usually measure out two hamburger patties to judge the amount)
2 TBS lemon juice
1/2 tsp salt
2 TBS fish sauce
1/2 TBS sugar
1 tsp ginza (ginger can be used as a substitute)
1 shallot sliced
5 garlic cloves
1 large chili, cut in half and thinly sliced
100 g lemon grass, thinly sliced (lemon peel can be used as a substitute)
Lettuce
Tomato
Onion
Cucumber
Chopped Mint or basil


Directions:
1. Heat skillet to medium. Add beef, lemon juice and salt.
2. After a few minutes add the fish sauce, ginza, shallot, garlic, chili, and sugar. Continue to simmer untl the meat is cooked through.
3. Meanwhile, prepare a salad of greens, tomato and chopped onion. Arrange this on a plate.
4. Once meat is cooked, add mint or basil to your likely. (The more the better!) Serve on top of salad with a side of sticky rice.


Later in the day I prepared dinner. We had purchased some bacon wrapped filets from a nearby meta shop so we cooked those up on our indoors grill since it was pouring rain outside. We had just done a huge pick of green beans at my inlaws garden so I knew we were going to have beans with supper but I wasn’t sure how I was going to cook them. I looked out the window and saw that my basil and mint plants were growing out of control so I went out in the rain and plucked a few leaves. I still wasn’t sure what I was going to do with beans, basil, and mint. I cubed some potatoes and boiled them in a pot not sure what I was going to do with those. As the potatoes were almost finished cooking, I got an idea.. how about an herb pesto sauce for a potato green bean salad? So I chopped up the herbs and some walnuts in my mini food processor. Then I added some olive oil, lemon juice, and salt/ pepper and processed it until the taste was right. I tossed this with the beans and potatoes. I do have to say that this was a refreshing twist from the classic potato salad mixed with tons of mayo…yuck! So what can I say I am NOT a mayo fan. This recipe is especially nice if the beans are right from the garden because they still have that crisp and potatoes fresh from the garden just melt in your mouth- absolutely nothing like the ones from the store. Enjoy!


Potato Green Bean Salad with Herb Pesto
Recipe Created By: Gretchen Brown
Serves 4-6

Ingredients:
4 red potatoes, cubed
1 1/2 cups fresh green beans, cut into 1 inch lengths
1/4 cup olive oil
1-2 TBS lemon juice
Handful of walnuts
Salt/ pepper
5-6 basil leaves
5-6 mint leaves

Directions:
1. Wash and cube potatoes and boil until cooked. Drain and set aside.
2. Cut beans into 1 inch lengths and blanch in boiling water for 2-3 minutes. Be sure to not overcook them. Immediately place in cold water bath for 1 minute.
3. Meanwhile, prepare pesto. Chop herbs and walnuts in food processor or mini chopper. Slowly add lemon juice and olive oil and pulse to the desired consistency. It should be in between a paste and a runny sauce. Add salt and pepper to your liking.
4. Toss beans, potatoes and pesto. Serve.


On Saturday, we had another special event to celebrate. On of my students who I taught in Korea came to Canada for a summer camp. I have been in contact with her mother for the past few weeks and we set up a time to meet! They would be taking the train to our home of Belleville and then we would pick them up and go to my inlaws home in the countryside for lunch. I couldn’t believe it when they stepped off the train. I never would have thought that I would have seen one of my students from Korea in this part of the world.

Of course I prepared all of the food and brought it over to the house. The weather finally broke from the hot, humid weather that plagued the East Coast all week, so we planned for a bbq. I created a menu of Beef and Vegetable Kebabs, Mixed Berry Salad with Mint, Green Beans, and Fresh Greens. The night before I skewered the meat and let it marinade over night in a cumin, coriander sauce. In the morning I skewered the veggies and covered them in a lemon basil marinade. The peppers and onions were from the garden, and the rest of the veggies were store bought but from local sources! I cut up some fresh berries, leaving room for the raspberries that we would add once we got to the farm, and tossed in some lemon juice, orange peel, and fresh mint. The beans and lettuce greens we would pick when we arrived.

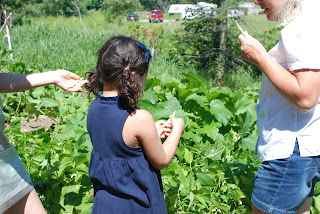
Once we arrived, we made all of our introductions, did a tour of the house, and then went out to the garden. We picked beans, lettuce, and raspberries. Rob and Glenn prepared the grill and loaded it up with skewers of meat, followed by the veggie skewers a few minutes later. The timing was perfect! Tracy and Wendy prepared the salad. Koogie helped me trim and cut the beans. Irene and the dog played bubbles on the porch. Finally it was time to eat. Dinner was lovely, except for some reason I forgot that children are picky eaters so the meal was only partially liked by Irene, leaving piles of mint and vegetables to the side of her plate.

After dinner we made our way outside to the campfire. We prepared the ingredients for Smores, which were a huge hit with Irene and Koogie. So much so that Irene almost climbed into the fire cooking her marshmallows. After Smores, Glenn and Irene went on a ride on the four-wheeler on the trails in the woods making for a true glimpse at Canadian country life! One ride wasn’t enough so after her second ride, we had to spoil the fun and make her aware that it was time to head to the train station. All in all, we had a great visit and I am still in awe that I was able to have one of my students visit me on this side of the world! What a great day!


Shish Kebab Marinade
Recipe From: cooks.com
Serves 4-6

Ingredients:
2 lbs beef sirloin or tenderloin, cut into 1 inch cubes
1/2 cup olive oil
1 TBS white vinegar
1 tsp cumin
1/2 tsp crushed coriander
1/2 tsp paprika
1 tsp minced garlic

Directions:
Prepare marinade 24 hours prior to grilling. Add beef cubes into freezer bag. Turn after 12 hours. Spary skewers with cooking spray to prevent cooking. (I also soaked the skewers in water for 30 minutes before skewering to prevent splitting.)


Vegetable Kebabs
Recipe Created by: Gretchen Brown
Serves 4-6

Ingredients:
1 pint cherry or grape tomatoes
1 pint small button or cremini mushrooms
1 green pepper, cut into 1 inch cubes
1 red onion, cut into 1 inch chunks
1/4 cup olive oil
1-2 TBS lemon juice
1 TBS white vinegar
1 TBS chopped fresh basil
Salt/ pepper

Directions:
1. Place vegetables on skewer mixing vegetables on each skewer.
2. Place in glass baking dish. Brush marinade on both side of each skewer. Drizzle remaining marinade over the skewers. Place in the fridge and turn and brush marinade over veggies after a few hours.
3. Place on grill when meat skewers are about halfway cooked.


Mixed Summer Berry Salad with Mint
Recipe Created by: Gretchen Brown
Serves 6-8

Ingredients:
1 quart starwberries
1 pint blueberries
1/2 pint raspberries and blackberries
10-12 mint leaves
1 TBS lemon juice
1 TBS grated orange peel

Directions:
1. Wash all fruit. Cut strawberries into pieces. Mix all fruit. Stir in lemon juice and grated orange peel.
2. Add mint right before serving.
3. This can be chilled up to 4 hours before serving.

7/08/2010

Maine 2010

Leave it to the day of a road trip to Maine to mark our one year anniversary for the battery on my alarm clock to die. This is so funny that this happened because I knew I was secretly cursing myself when I told my mother that I have had the same battery in my clock for over 5 years now. The next day it stopped working…good luck, eh? Well anyway my husband did have energy to get up before the sun- now this never happens on a work day, but when it means a lake and fish are in his near future- he can wake up! So the battery incident only put us behind schedule by about 1.5 hours… not that bad because we still left at 5:45 am. Maybe you are wondering why on earth we were planning on leaving at 4am anyway. Well, if you have ever been to Maine, you would know why!


The drive was expected to take about 9.5 hours as quoted by Mapquest and Google directions, but I seriously wonder if they take into account the speed limits along the way before they write these directions or if they strictly go by mileage and an average speed of 60mph. The ride itself was a straight shot across the 401 into Upstate New York going east on Highway 11 around Lake Champlain and picking up Highway 2 across Vermont, New Hampshire, and into Maine. We passed through many scenic, historic towns that were full of charm. Each town was separated by miles of idyllic countryside providing spectacular glimpses of unspoiled land. It was easy to put corporate America aside along this drive as local dining establishments and antique stores were thriving in place of McDonald’s and shopping malls. We passed dozens of roadside vegetable stands, farms, and homemade country craft vendors. The biggest town we went through was Burlington, Vermont which is barely the size of a small New Jersey suburb. After about 5 hours in the car and not even out of New York yet, we were starting to doubt the validity of our directions. We knew there was no way we were going to go completely across 2 states and halfway across another in 4.5 hours. So we just enjoyed the ride for its peacefulness and lack of interstates and arrived at our destination nearly 13 hours after departing.


Once we turned onto South Mountain Drive we were totally at ease and one hundred percent in relaxation mode for 2 whole weeks! The street itself is nothing more than a gravel dirt road lined with wildflowers, ferns and evergreen trees, winding through the hills overlooking Great Pond in the Belgrade Lakes region of Maine. It is gorgeous in itself. Our car twisted and turned down the road and memories from our wedding quickly came back. In July 2009 we got hitched in this very neighborhood with our closest friends and family. Now we are back to celebrate one year as well as Canada Day and the 4th of July!


As we pulled in the driveway, the car was barely in park before we jumped out to say hello to the lake before unpacking our belongings. The cottage was exactly as I remembered it… perfect! After we brought all of our stuff inside, we grabbed a cold beer and headed to the dock to take it all in. It wasn’t long before we were greeted by the loons with their distinctive call, only later to learn that this is actually a cry of distress or endangerment, and the chipmunks and red squirrels scurrying across the yard. Since we were famished after being in the car for so long, we fired up the ole barby and had some beer brats for supper. At supper we thought about all of the possibilities for tomorrow… fishing, kayaking, swimming, hiking, and the list goes on. Where shall we begin? We crashed early so tomorrow could begin sooner than later. Part of the beauty of being lakefront is listening to all of the noises in the night instead of sleeping; hooting owls, crashing waves, bats squeaking, wind blowing, rain drops falling, and mysterious creatures tramping through the leaves below. What potential it leaves for one’s imagination!


A magnificent day greeted us at the crack of dawn with the sun glistening over the lake and nothing but a bright blue sky overhead. I am not sure who jumped out of bed first to take part in its beauty! The morning air was brisk enough to require a sweater for coffee on the dock, but not cold enough for the flip flops to be replaced by shoes. After a pot of coffee, we had a quick breakfast of fresh tomatoes and basil on an English muffin and sliced strawberries. Then we were off.


We loaded up the kayaks with cold water and set off to the Marina. It was time for Bob to get his fishing license so he could catch “Walter.” The pond was quiet and peaceful. The only noises were the occasional boat going by, a seaplane overhead, and birds calling to their mate. We drifted through Purgatory Cove which is an ideal spot for bird watching, as many birds come here to nest and hide from predators. As we floated in, we had to be careful of large rocks above surface level, so as to not crash. The cove was covered with lily pads, that were just about to bloom with a brilliant yellow lotus flower, and other varieties of aquatic plants. We were lucky enough to see an otter swimming across the cove to shore, as well as bullfrogs, loons, turtles, and a variety of small birds. We didn’t stay long because we didn’t want to disturb the peace of the wildlife, so we continued along to the Marina. We were greeted at the Marina by a friendly black lab, who was curious about our boats and our arrival onto shore. We headed inside to buy a fishing license and walked out with a handful of literature about the area as well. Once we got back to our boat, we noticed that it was being inspected by a whole flock of puppies now. I was in heaven as an eight and a half week old Golden Lab and a 3 month old Chocolate Lab playfully ran to my feet to say hello. The puppies frolicked in the sand while we drooled over their cuteness for awhile before we were off to make our way back to the fishing gear.


Bob loaded up the fishing gear while I immersed myself in book #1 for the trip, The Girls Guide to Hunting and Fishing by Melissa Banks, which is turning out to be light vacation reading material. Once my ADD kicked in, I moved onto a whole stack of cooking magazines and thought about our meals for the next few weeks. We arrived at the onset of the fresh produce season, so I knew we were going to be eating well, especially because the cottage is located only a stone’s throw away from many local farms and in an area with farmer’s markets galore. Now can the patience hold out for Saturday’s Farmer’s Market, being that is only Friday!


There is just something about being at the cottage that makes me drift off into a state of euphoria. The rest of my afternoon and evening was spent making the most of this feeling. At the end of the day, we were able to witness a glorious full moon shining over the lake, slowly being put to bed by a blanket of clouds. What a wonderful ending to a beautiful day.


Morning came again and we were greeted by the glorious sun once again. We brewed a pot of coffee and made our way to the dock to begin our morning entranced by the lake’s calmness and beauty. This morning was a wonderful one for observing the wildlife that makes people return to Maine year after year. A pair of loons swam right up to the dock, less than five feet away from us, an otter paddled by, and a large heron swooped overhead. Along the shoreline, in the rocks, four little animals about the size of a grey squirrel scampered by while intermittently taking a swim in the water. It was so neat, but I am still unsure what they were. What a wonderful start to the day, but too bad I didn’t have my camera!


Mid morning we took a scenic drive down Route 27 in the direction of Farmington to hit up the Farmer’s Market. Farmington is a quaint little town with little shops and cafes. It even had its own moose walking around in boxer shorts! What a job that guy must have. Since it is still early in the season, only about a week ahead of Ontario’s season, there were not many farms representing quite yet. But the ones that were there were good enough for our needs. We picked up some fresh herbs; basil, chives, cilantro, and parsley, because lately I can’t seem to cook any other way than with them. We walked down a few stalls and browsed at the homemade pies, cookies, jams, and honey, until we came to the woman selling garlic scapes. Garlic scapes are still a new vegetable to me, but it was in Maine last year that I fell in love with this vegetable. It is simply the young green that grows during early summer at the top of the garlic plant. Scapes are eaten before the garlic bulb is harvested. They are pungent and full of that garlicky flavor that I love! The most interesting part about scapes is their unique shape- they twist, turn and curly cue. They look marvelous on one’s plate!


Once we returned home, I couldn’t wait to dive into my market goodies and create some delicious food that marked the beginning of summer. I marinated some chicken breasts in a mixture of olive oil, lemon juice, garlic, vinegar, fresh chopped basil and parsley that would later be put on the grill. With the leftover marinade, I added some black olives and fresh lemon slices to be used as garnish later. I washed the scapes and sautéed them in olive oil, sea salt, and black pepper and served them with roasted red pepper hummus that unfortunately was not homemade. But it was organic and since I am on vacation in a cottage with bare essentials I made it work and besides the hummus was fabulous. I think there is no way to go wrong with pureed chick peas, garlic, and roasted red peppers anyway. After the chicken was grilled I placed it on top of the scapes that I arranged on the plate. I topped each chicken breast with a lemon slice and a black olive. On another plate, I prepared some tapas of marinated olives, chick peas, hummus, and crackers. What a delicious, healthy dinner.


Lemon Chicken
Recipe Adapted From: Real Simple Makes: 4 servings

Ingredients:
4 boneless skinless chicken breasts
1/4 cup extra virgin olive oil
1 TBS vinegar
Juice of 1 lemon
1-2 TBS chopped fresh basil
1 TBS chopped fresh parsley
Sea salt/ pepper
Kalamata olives
1 lemon sliced

Directions:
1. Wash chicken and pat dry. Pound into thin slices or butterfly pieces.

2. Whisk olive oil, vinegar, lemon juice, salt, pepper, and fresh herbs until emulsified.

3. Place chicken into glass pan. Pour 3/4 of the marinade over the chicken and reserve the rest. Cover chicken and place in the refrigerator for a few hours. Turn chicken at least once.


4. Add olives and lemon slices to reserved marinade and refrigerate.


5. Grill chicken over medium heat until done.

6. Top with reserved marinade, olives, and lemon slices.

7. Serve with marinated chick peas, hummus, and grilled garlic scapes.


After dinner we enjoyed yet another moonlit evening over the lake and listened to the creatures of the night come out and enjoy their part of the day.


Awakened by rain pouring down and waves crashing to the shore, I quickly fell back into a peaceful sleep and slept in past sun up. This is rare at the cottage to sleep in except for the occasional rainy days, which are nice too.


After coffee, we enjoyed a nice breakfast of toasted English muffins, cream cheese, tomato slices, red onion, and fresh basil. Simple, yet devine. The rain subsided and we got ambitious. I walked into town to the Belgrade Lakes Farmer’s Market and bought fresh sourdough bread, maple syrup, and lip balm made from bee’s wax. This market had more vendors that the one in Farmington on Saturday. People sold goat cheese, strawberries, sausages, wood crafts, knitted clothing, vegetables, soaps, and the list goes on. The walk home was nice as the sun came out from behind the clouds. I leisurely walked home and photographed the wildflowers and the town before passing Rome Horse farm which was a signal that I was almost home. I collected a bunch of wildflowers for the kitchen counter at the cottage. I am a sucker for fresh flowers especially wildflowers. They are my ultimate favorite.


We decided that we were going to kayak around Hoyt’s Island, which is located across from our cottage. From a distance it looks to be about a mile long and who knows how wide. We packed up some bottles of water and our life vests and headed out to the kayaks.


The water was a little rougher than the past few days, but hardly rough enough to meet the definition of rough in the world of true kayakers. We made our way out into the middle of the channel to cross the lake in a safe way so that fishing boats could easily spot us. We headed around the island staying pretty close to the shoreline when there wasn’t a home and moved further away when we approached a house. We didn’t want to be those spooky kayakers creeping too close to someone’s home..haha. The interesting part of this island is that the only way to get there is by boat so there are no cars on it and supposedly it is without electricity. Although I am in question of that a little since many houses had several lights on during the day and satelitte dishes were installed to bring in tv. Interesting?


The ride around Hoyt’s Island took about three hours, although we did stop fairly frequently to just “float” and to remain hydrated. I did get stuck a few times and almost lost my head to a fallen tree branch but this was mostly due to my less than ideal steering skills. All in the all the trip was a nice way to enjoy a beautiful day and it made us aware that several islands exist in Great Pond that are not visible from our secluded dock. We were very happy to return to our dock and enjoy a cold beer that would not only refresh us but also help to cure our slightly sunburned skin.


After a three plus hour ride, we were starving. Tonight’s menu was going to be simple because we were pretty tired. We fired up the grill and cooked some hamburgers that were made with horseradish and cilantro. While we waited, we ate fresh salsa with tomatoes, red onions, garlic, cilantro and lime juice with toasted corn chips. The burgers were good but I didn’t add enough horse radish to give them the kick I was going for. After supper and a few beers, we had a lazy night of relaxing.


Fresh Salsa
Makes 4 servings

Ingredients:
3-4 tomatoes, chopped
1/2 red onion, chopped
1 clove garlic, minced
1 pepper, chopped
1-2 TBS chopped cilantro
Juice from 1 lime
Salt and pepper

Directions:
1. Stir together all ingredients and chill in the refrigerator until cold.
2. Serve with blue corn tortilla chips.


The week continued on in a similar fashion full of relaxation, reading, cooking, and taking it easy. The nights and days from here all blended into one so trying to distinguish them from the one before would be very challenging! We did go back to the Lakewood Theater, where we got married a year ago, to celebrate our one year anniversary.  We enjoyed a lovely dinner of Bacon Wrapped Cod with Cilatrano Pesto and Fresh Tomato Quinoa followed by Peach and Strawberry Cheesecake.  We watched a show called Ring of Fire highlighting the life of Johnny Cash.  What a lovely evening.


The family joined us to celebrate the Fourth of July and stayed into the next week. We headed into town to watch the 4th of July parade which was full of small town charm. All of the participants and spectators were dressed from head to toe in red, white, and blue to show their patriotism. The antique cars arrived followed by a group of go-karting middle aged men, children on bicycles, and local environmental groups marched down the street. Representatives from Winterberry Farms also passed through in their antique farm truck tossing handfuls of fresh pea pods at the crowd. Uncle Sam even made his debut. From here we went back to the house for cocktails and dinner before fireworks over the lake. What a super holiday!

The week with the family continued with exciting events such as an authentic Maine lobster dinner (my first ever) and Sailor, our dog, learning how to swim for the first time.  We even had a visit from two pirates from Schuykill Haven, PA.  All in all, it was a wonderful getaway and very much needed.


The ride home was just as scenic as the ride there, except the sun was shining making the ride even more spectacular. I was drifting off into a deep sleep while the hub was driving and I was woken very suddenly by Mr. Brown. I look up and start to panic that something is seriously wrong, however he was just making our trip to Maine complete by pointing out a moose in the meadow alongside the road. What a fantastic site to see! From the loons swimming up to our kayaks no more than 3 feet away from our oars, to the egret landing on our dock, to the family of crown feathered ducks, to the ermines and muskrats, and of course the moose… we had a vacation full of natural wonders. Until next year!

Homemade Barbeque Sauce

So once again there has been quite a gap in my blog posts, but it doesn’t mean I have stopped creating delicious treats, I have just been overwhelmed with transitioning back into Canadian life. We just moved from the in-laws into our new apartment and have been settling into our new nest as well as trying to get started with our career again. It is pretty tough stuff!


But now that we have our own place and access to all of our wonderful kitchen supplies that have been in storage for almost 5 years because of our overseas adventures, we are ready to rock and roll and create an unlimited array of yummy things!

The first recipe that I am going to post is for Homemade Barbeque Sauce. I found this recipe months ago and just needed to find the right time to make it. So I decided to make it for Father’s Day and combine a jar of it with some barbeque tools for the dads. What a great gift!

I prepared all of my ingredients from my pantry and had a hard time finding the chile peppers called for in the recipe, but I didn’t give up and luckily my husband didn’t mind too much driving me all over the city checking every grocery store for them. These peppers are a must and can’t be substituted because in my opinion the smokiness of them “makes” the sauce.

As I was letting the sauce simmer, it was almost instantly that the aroma took over my house. What a delicious combination of sweet and spicy. The molasses in the sauce allowed for a sweetness that was not too overpowering like sugar or ketchup would provide in a typical barbeque recipe. After nearly an hour of simmering, I prepared my sterilized quart sized canning jars and poured the blended sauce into them. Since I went a little overboard on tasting the sauce during the simmering process, the jars were a little shy of sauce…whoops! I prepared a homemade label and glued some ribbon around the lid to spruce up the ordinary canning jar. I let it cool and then put the jar in the fridge to chill. This sauce will keep in the fridge for about 2 weeks. Overall I was very impressed with the flavor of this sauce, however I am not sure I would just stick to using it on the barbeque. It is fantastic on chicken wings, pizza, and tossed with pasta. Hope you enjoy this recipe!


Barbeque Sauce
Recipe From: Martha Stewart
Makes about 1 quart

Ingredients:
• 1 1/2 tablespoons extra-virgin olive oil
• 1/2 Spanish onion, finely chopped
• 2 garlic cloves, minced
• 1 can (28-ounces) crushed tomatoes
• 1 canned chipotle chile, packed in adobo sauce, minced
• 1 1/2 tablespoons Worcestershire sauce
• 1 1/2 tablespoons cider vinegar
• 1/4 cup unsulfured molasses
• Juice of 1/2 lemon
• Coarse salt and freshly ground black pepper


Directions:

1. In a medium saucepan, heat oil over medium heat. Add onion and garlic. Cook, stirring, until onion is soft and translucent, about 5 minutes.

2. Stir in tomatoes, chile, Worcestershire, vinegar, molasses, and lemon juice. Simmer over medium-low heat until reduced by a fourth, stirring occasionally, about 45 minutes.

3. Working in batches, purée sauce in a blender. Season with salt and black pepper. Refrigerate in a jar up to 2 weeks.