Search This Blog

4/21/2011

Natural Dyed Easter Eggs

This morning when I took Darcy out for a walk, I saw the Easter Bunny scurry through our neighbor’s lawn. I thought today would be a perfect day to dye eggs. I usually buy my eggs from a local farmer, but since they all have brown shells, I committed a sin and bought a box of white shelled organic eggs from the supermarket. I am hoping that the chickens were treated in a humane way before the eggs got into my egg carton.


I am very much against the use of artificial food dyes in food, so I sought out a way to dye eggs without using those little colored tablets that remind me of my childhood. After some research on the subject, I found some interesting ideas out there.

I went to work scouring my cupboards for anything that might change the color of a vinegar water solution, which would in turn dye the shells of my eggs. The things I came up with were turmeric powder, a mixture of Korean red pepper flakes and red pepper paste, blueberries, and pureed spinach. While allowing my eggs to cool after hard boiling them, I mixed 2 cups of water and 1 TBS white vinegar with the “coloring” of choice and brought them to a boil. I turned down the heat and simmered the mixture for about 15 minutes. I poured the solution into a coffee mug and allowed it to cool before adding the egg. I added one egg to each cup and left them there for about 20 minutes or so, turning them with a spoon every so often.
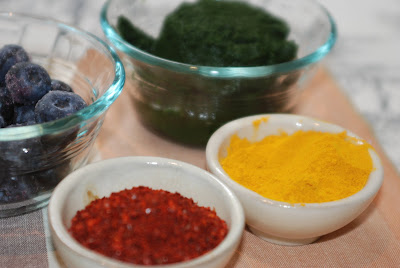

Some of the colors worked better than others. The spinach solution turned a horrible shade of brownish green and resulted in a sad looking “Easter” egg which was nothing more than white with little bits of dried spinach stuck to the shell. The turmeric produced some lovely yellow colored eggs, while the blueberries turned the shells a nice shade of purplish blue. Finally the red pepper combo made for some light orange shells. Overall the blueberries and turmeric were the most successful.


This experiment was pretty fun although very time consuming. I would definitely try again next year, but hope to have a different variety of things in my cupboards to make the dying more successful!

4/16/2011

The Village Green and Railway Creek Farms

Rob and I have spring fever to the max and were bummed when we saw the rain today! Our plans of enjoying the great outdoors had to be postponed for another weekend but we couldn’t’ let that ruin our day. Along with the arrival of spring, comes the plans for adding to the “family garden” that will be planted as soon as the threat of frost is no more and the desire to do a better job of supporting local farmers and companies. Grossed out by an article that I read this morning about the addition of steroids and hormones in grocery store meat aka factory farmed meat, it totally convinced us never to buy meat from a grocery store again, because you just never know what you are getting. For the past few years, I have tried very hard to buy grain fed and grass fed meat when possible but it is not always available at the supermarket. This article reconfirmed the fact that the government really does not care about what goes into the food that people eat and we must go beyond the government to regulate what we eat. Read Michael Pollan's book The Omnivore's Dilemma and you will never return to the grocery store for meat yourself. All of this led us to a trip to Gilmour’s Meat Shop in the County to check out their local stock. We purchased a few of the sausages made on site including the Maple and the Rossmore Hot XXX, which we are going to add to a pizza later on tonight. Hopefully they are good! It felt so much better to support a local business but I did still leave with the question, where is all of their meat coming from?


With this question in mind, we switched gears and headed to Foxboro and had planting on our mind as we pulled into The Village Green. (www.thevillagegreen.ca) This store sells heirloom seeds and a huge variety of local goods from honey to soaps to jewellery to literature. You name it they have, but almost every item sold in the store is made by someone that the store owner knows personally! When we went in there we explained to the owner, Karyn Wright, that we were interested in eating locally and how hard we try to support local growers and farmers. She handed us a map created by Harvest Hastings listing all of the farms in the area with all of their specialties listed. She asked what some of our challenges were and we explained that finding local grains was the hardest and she automatically directed us to a mill in Marmora called CIPM Farm that harvests and produces red fife wheat flour, hemp, spelt, oats, and rye! Can’t wait to check this out! Then we also mentioned that finding a good beef connection was tricky because we have tried a few farmer’s meats and they haven’t been that good. At that moment the women, Elly Blanchard, from Railway Creek Farm (www.railwaycreekfarms.com) in Marmora walked in, which is Karyn’s direct connection for beef! When she took off her rain coat hood and showed her face, I recognized her right away as the “Garlic Lady” from the Belleville Farmer’s Market. I could never forget the face of someone who grows over a dozen varieties of garlic…she is my idol and I just ran out of her amazing garlic and had to resort to using garlic imported from China, which is just not the same. What are the chances of this to be having a conversation about where to get good beef and in walks the farmer herself! She ran to her car and came back in with her cooler of meat and a basket of garlic. We dove in and bought a few pounds of stew meat and a large handful of garlic! We were so excited. We also bought a bag of coriander seeds to give growing cilantro another go this year as we made the mistake of transplanting it last year and lost it all. Life is too short to be deprived of cilantro!

Karyn did mention that on April 30th, the store, The Village Green, is having a 10th Anniversary party which is going to feature alpacas from OH Alpacas in Stirling, native tree give-aways, marigold seedling give-aways, honey from Twin Sisters and many other exciting events! It is already marked on my calendar! It is going to be a wonderful event and a great way to meet so many local connections!

All in all we had a productive and knowledgeable rainy afternoon. We are so eager for planting season to get here so that we can contribute our part to making the world more sustainable, but in the meantime the next best thing is to support those who can provide sustainable goods now!

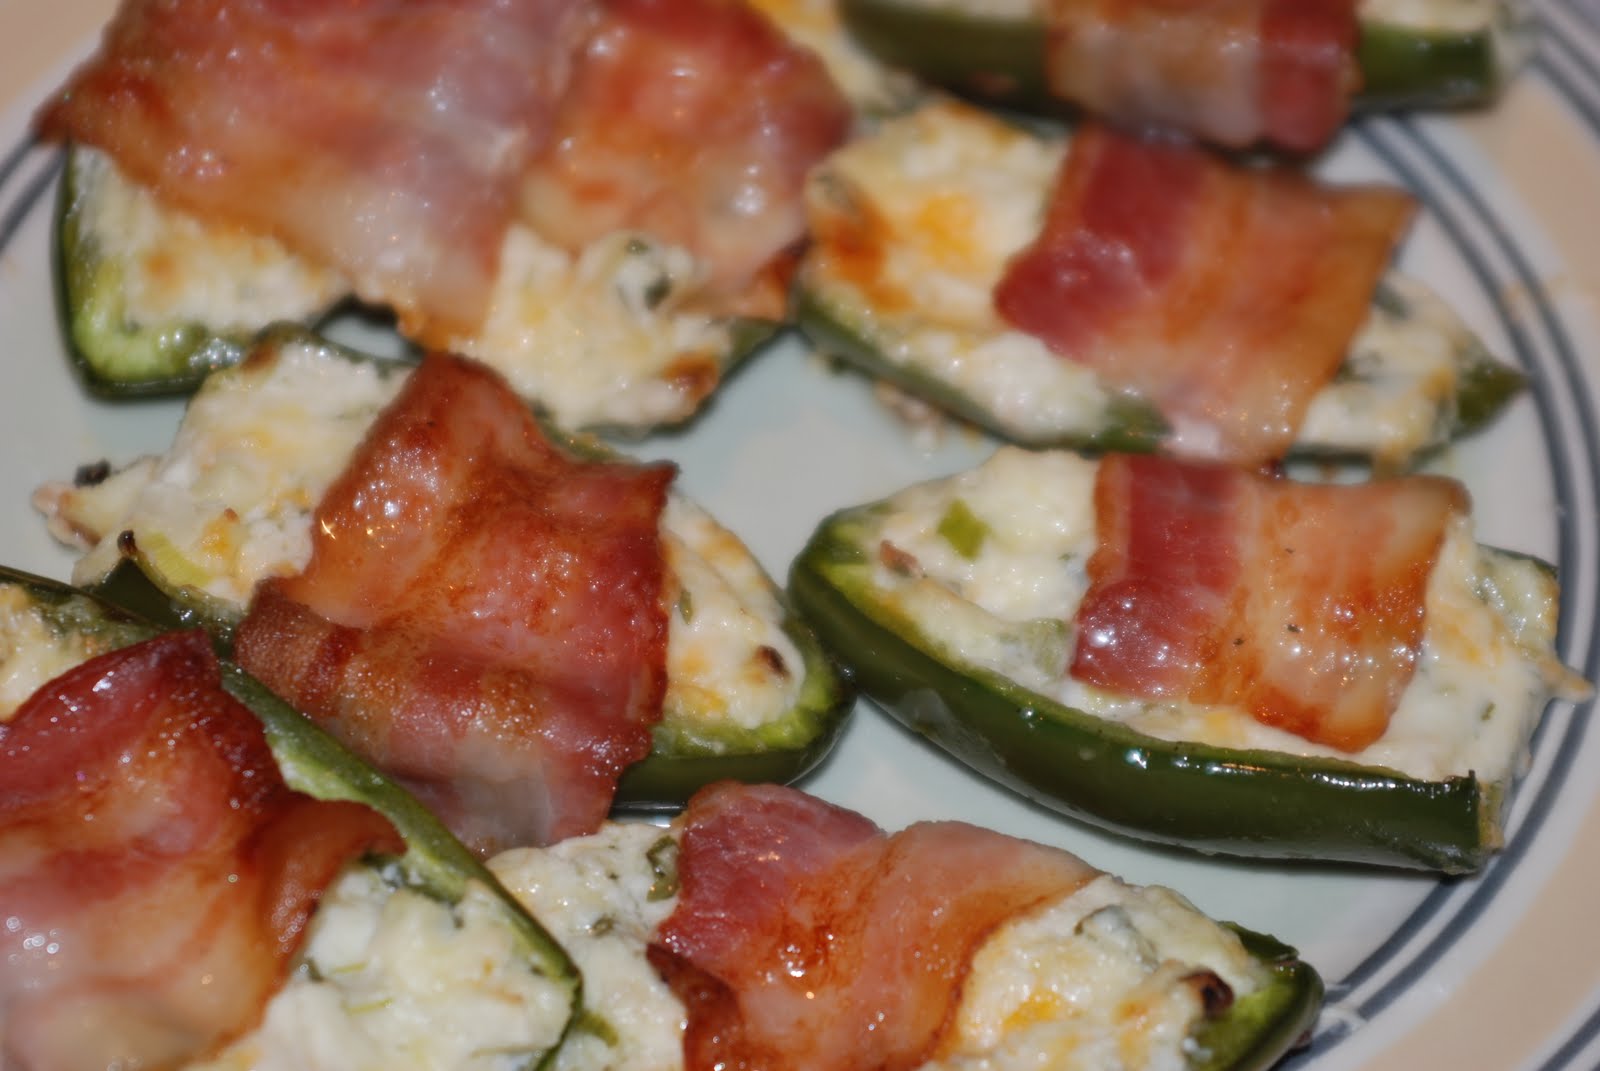
Bacon Wrapped Apple Cheddar Jalapenos

All week Rob and I planned to get out of town this weekend to take advantage of spring, but then the floodgates opened from above and we postponed our plans. That is what we get for joining the world of planners! Therefore we woke up Saturday morning and couldn’t think of anything better to do than cook and watch movies. I have been holding onto the recipe that follows for quite some time, waiting for the perfect lounging kind of day. I found a similar recipe on the blog Erin Cooks but modified it to our liking. The only thing I would change is that I would possibly cook the bacon ahead of time and add crispy bacon to the cheese mixture (to avoid the excess grease) and sprinkle the stuffed jalapeno with panko bread crumbs to give it a bit of a crunch. They were a big hit with the hub but the grease was a little too much for our liking and the crispiness of a fried popper was missing. But all in all, the apple gave a nice flavour to the cheese mixture and the addition of cheddar was key. They were amazing and were the perfect accompaniment to our Band of Brothers marathon!


Bacon Wrapped Apple Cheddar Jalapenos


Ingredients:

8 jalapenos, cut in half and deseeded
4 oz cream cheese, softened
2-3 green onions, chopped
1/2 cup shredded cheddar cheese
1/4 apple chopped, peel removed
2 cloves garlic, minced
4 slices of bacon cut into fourths
Salt and pepper

Directions:
Cut off the stem and slice jalapenos in half lengthwise. Remove seeds.
Mix all other ingredients, except bacon, and stuff jalapenos with the mixture.
Wrap a slice of bacon around the jalapenos and secure with toothpicks if needed.
Cook at 400°F and bake for 20-25 minutes or until bacon is crispy.

Modifications: Top the jalapenos with panko bread crumbs before rolling with bacon. Add crispy bacon to the cream cheese mixture in lieu of bacon around the jalapeno- this will cut down on the grease. If you choose this method, spray the baking dish with oil to prevent sticking.


1/09/2011

Chocolate Chipotle Chicken Chili


So I am facing another day of not getting called to teach so since the ground is covered in snow and my dog is passed out snoring, I decided why not make dinner now at noon. I have been craving chilli so I searched my pantry for interesting things to add to it instead of the usual ingredients. I had some leftover chicken thighs in the fridge so I started there and pulled the meat off the bone. Then I had a few peppers and onions so I chopped those and added a few cloves of some kick ass Polish garlic that our exotic “garlic lady” recommended. (Of course she grows it all locally.) Then I found a can of chipotle peppers in adobo sauce so I chopped up a few of those. I added some black beans and tomatoes from the garden this past summer. Then I tasted it and it needed something else. I looked and looked for the magical ingredient and alas I found it… unsweetened chocolate. It added a nice flavour and thickened up the chilli very nicely after given time to simmer. The only thing it is missing is probably a hint of cilantro but it will have to do without because I am not going back to the store to get it. After simmering for awhile the flavours all came together and when I tell you I may have gone over bad with the chipotles, I mean it. This chilli is not for the weak at heart, but rather for ones with dragon like senses like myself… Enjoy!


Chocolate Chipotle Chicken Chili

Ingredients:
1 red pepper, chopped
1 yellow pepper, chopped
1 onion, chopped
1 rib of celery, chopped
3 cloves of garlic, chopped
Chopped chicken breast meat or leftover chicken cut in pieces
3 TBS brown sugar
1 TBS unsweetened cocoa powder
2 TBS chilli powder
1-2 tsp of cumin
2 TBS chopped chipotle peppers in adobo sauce
Salt/ pepper
1 can of black beans, rinsed and drained
2 cups chicken broth
28 oz can of diced tomatoes, with juice
2 oz unsweetened chocolate, chopped
Green onions, for garnish
Sour cream, for garnish
Avocado Slices, optional garnish

 
Directions: Saute onions, peppers, garlic and raw chicken until veggies are soft and chicken is cooked. If using leftover cooked met, then add the meat after the veggies are cooked.

Add the sugar through the tomatoes and cook to a boil. Turn the heat down and add the chocolate slowly until desired taste is reached. Continue to simmer until chilli reaches the desired thickness.

Top with a dollop of sour cream, an avocado slice, and chopped green onions.

Serve with cornbread.


Warning: This is very spicy, but really good!


1/05/2011

Team USA vs. Team Canada

So the time has come again for the United States to team up against Canada in the World Junior Hockey Tournament.  Since this was the first year in a long time to watch the game on one of our home turfs.  I  decided what better way to bring the rivalry up a notch with some team pizzas.  I made a Canadian flag for Rob using a slice of pepperoni in the shape of a maple leaf for and a pattern of sauce and cheese to make the red and white portions of the flag. 


For the US flag, I did something that I can say that I have only purposefully done a handful of times in my life and that was add blue food coloring to the cheese to make the blue portion of the flag. Now I had all good intentions to pick up a purple potato and make a pile of bluish purple mashed potatoes, however the store  was out of them.  So I resorted to dying a handful of shredded cheese blue. I used thin slices of pepperoni and mozzarella cheese for the read and white stripes and chopped garlic for the stars. 


The table was set with our opposing team flags and of course our signature pizzas. He wouldn’t touch a slice of the US flag pizza and I wouldn’t dare touch a piece of his Canadian flag.  Too bad the US lost so I couldn’t rub it in.  Well that is enough rivalry for one season. 


Now back to living in harmony with each other ;)


12/07/2010

Holiday Cookie Exchange- Year 3

Every holiday season for the past few years I have hosted a Cookie Exchange. The last two years the party was especially unique because we lived in Korea and having an oven was pretty much unheard of so baking was a huge challenge. So this year Christmas baking was a breeze! I invited a few friends and family members over for an afternoon of lunch, music, and baked goods. The thing I love about cookie exchanges is that you get to sample so many treats and add new recipes to your collection.

I always am faced with the dilemma of what cookie recipe to share because if I had my way I would find an excuse to bake about 10 different kinds myself, but I exerted some self control and only baked two of my favourite cookies. The two recipes I chose bring me back to my childhood and memories of preparing for the holidays with my mother and my sisters. I guess I shouldn't leave out my dad either he made a wonderful taste tester. They both come from Betty Crocker’s Christmas Cookbook published centuries ago!

The Chocolate Peppermint Pretzels are a twist on a chocolate shortbread cookie drizzled with semi sweet chocolate and sprinkled with crushed candy canes which make them absolute heaven. My mother used to take hours to roll this dough out and shape each individual pretzel. I started to roll out a few and for some reason the dough was crumblier than I remember. I was not blessed with the same amount of patience as her so I resorted to rolling the whole recipe of dough out and used a star cookie cutter to shape each cookie. They still turned out lovely and absolutely delicious!

Now the Cranberry Ginger Pinwheels are my most favourite jam cookie. The recipe is so easy to make and rolls out beautifully. Now these are also time consuming but they are worth every second. The dough gets chilled so that it is nice and easy to roll out. Once you roll out the dough, you must cut the dough into 2 1/2 inch squares and cut a diagonal in each corner of the square. A blob of jam goes in the centre of each square and then you fold every other corner to the centre to resemble a pinwheel. Now in the past I have just used raspberry jam from the store, but since I have become very keen to making chutneys and fruit sauces this year, I made up a concoction of my own to go in the centre. Plain Jane I am not, therefore I like to create what I call “Gourmet Simple.” I took some of the everlasting supply of cranberries from my freezer and boiled them with some sugar and water for a few minutes. Then I added some orange marmalade and fresh ginger. I let it set up into a jelly like consistency and it was good to go for the centre of the cookie. I dusted the finished cookies with some powdered sugar and voila perfection!

There were massive amounts of cookies to share this year and everyone brought something different which was wonderful. Some of them included Mint Chocolate Chip Cookies, Gingerbread, Chocolate Fudge, Shortbread with Chocolate Chunks, Peanut Butter Balls, and Chocolate Butterscotch Candies. My freezer is full of goodies that will last throughout the holiday season. Wait who am I kidding they will be gone in no time!


Chocolate Peppermint Pretzels
From: Betty Crocker's Christmas Cookbook
Makes: 5-6 dozen

Ingredients:
1 cup powdered sugar
1/2 cup margarine or butter, softened
1/2 cup shortening
1 egg
1 1/2 tsp vanilla
2 1/2 cups flour
1/2 cup cocoa
1 tsp salt
Chocolate Glaze
1/4 cup crushed candy canes

Directions:
1. Mix powdered sugar, butter, shortening, egg, and vanilla.  Stir in flour, cocoa, and salt.
2. Knead level tablespoonfuls of dough with hands until the right consistency for molding. Roll into pencil like rope, about 9 inches long. Twist into pretzel shape and put on ungreased cookie sheet.
3. Bake at 375 F for about 9 minutes. Let cool for a few minutes before removing from tray.
4. Drizzle with chocolate glaze and sprinkle with crushed candy canes.

Chocolate Glaze: Melt 2 ounces of unsweetened chocolate and 2 TBS of butter over low heat until melted.  remove from the heat and add 2 cups of powdered sugar.  Add 3-4 TBS of water until smooth and no lumps remain. 


Cranberry Ginger Pinwheels
Recipe From: Betty Crocker's Christmas Cookbook
Makes: 5-6 dozen

 Ingredients for Dough:
 1 cup sugar
 3/4 cup shortening (part butter, part shortening- I used 1/2 cup butter and 1/4 cup shortening)
 2 eggs
 1 tsp vanilla
 2 1/2 cups all- purpose flour
 1 tsp baking powder
 1 tsp salt
 about 1/2 cup Cranberry Ginger Marmalade (see below)


Ingredients for Filling:
1/2 cup cranberries
1/4 cup sugar ( or less for a more tart filling)
1 TBS water
1/4 cup orange marmalade
1 teaspoon grated fresh ginger or 1/4 tsp powdered ginger

Directions for Cookies:
1. Mix sugar, shortening, eggs, and vanilla.  Stir in flour, baking powder and salt. Divide into thirds. Cover and refrigerate for at least an hour.
2. Roll out about 1/3 of the dough at a time into a large square on a lightly floured surface.  Cut into 3x3 squares, smaller or larger depending on your preference. Cut squares diagnolly from each corner to almost the center.  Place 1/2 teaspoon of cranberry mixture into the center.  Fold every other corner to the center to make a pinwheel.
3. Heat oven to 400 F. Bake until golden brown, about 6 minutes.

Directions for Filling:
1. Bring the berries, sugar, and water to a boil over medium heat.  Reduce heat and simmer for about 5-6 minutes. or until slightly thickened.  Stir on ginger and marmalade.  Set aside to cool.


11/14/2010

Traditional Mincemeat Pie

The holidays are quickly approaching and for some reason I seem to be in the Christmas spirit much earlier than in previous years. The Christmas “fever” has already hit me and it is not even Thanksgiving yet. My house is decorated, the shopping is almost done, cards are being made, cookie lists are being prepared, visits with family are in the works, and the list goes on. One of the things I love about the holiday season is that it always brings back memories of my childhood.


I was blessed to have had a very good childhood that is chock full of family memories. When I was really young, my parents used to pack the car so tight with stuff (that we were never allowed to see on the way there…hmm Santa maybe) and then jam all the kids and dog into the minivan to take a road trip to Ohio to visit our grandmothers and our extended family. Ohio was the gathering place for both sides of the family. We used to go back and forth to different relatives houses to celebrate. Our visits would include so much food that is surprising that they managed to bring us all back in one piece!


One of my fondest memories during these visits was Grandma Hengesbach’s desserts. She always had enough cookies to feed an army, pumpkin pie, and mincemeat pie. Now when I was a kid I would have never dared to try mincemeat pie because the thought of meat for dessert was not appealing. However it was not until later on that I discovered that her mincemeat didn’t even contain meat at all… oh how naïve I was as a child! Sadly she is not around anymore to share her recipe with me, which after all of these years I thought was homemade but my mother tells me otherwise. To keep alive her holiday tradition I have attempted to make my own mincemeat totally from scratch.


I did a lot of research on mincemeat recipes which was not originally the plan but I became so intriqued with what I found. Traditional mince pies trace back to England and the idea was created as a means of preserving meat for the winter. The combination of meat, lard, fruit, vinegar, and molasses helped to preserve them for the cold months ahead. When the British arrived in America they brought their tradition of mince pies with them. But eventually over time, the authenticity changed and the meat was omitted and replaced with dried candied fruits. This is now what people think of when they think of mincemeat pies. Since I enjoy keeping to tradition, I chose to make a recipe that includes real beef and beef suet which provide for a more authentic mince pie.


I went to my local butcher and asked for a chunk of beef suet and he happily obliged to give me a piece of the lard at no cost might I add. I gathered the rest of the ingredients and came home to start preparing. I simmered the beef cubes for about an hour until they were tender, then proceeded to shred them in the food processor. Then I mixed the fruit, shredded meat, spices and suet and simmered them for about an hour. I couldn't find currants around here so I used a mixture of golden raisins and sultana raisins.  I had a large amount of difficulty getting the suet to melt, therefore I managed to scoop most of it out and added a few tablespoons of butter to coat the fruit instead. This was my first time using suet so I wasn’t sure what to expect. The reason it didn’t melt is unclear to me, but it could have been because the suet was not traditional in that it came from around the kidneys, or because I did not cut the suet small enough to melt. Regardless, butter worked as a nice substitute. The fragrance from the simmering mincemeat was wonderful and overtook my house for hours. I opted to try a new recipe for pie crust which I will not even post because I was not impressed with the consistency of it. Sometimes it is best not to mess with a good thing.


Overall I was impressed with the filling. The pie was very rich and full of flavour. The combination of the sweetness of the fruit and spices mixed with the meat was delicious.  The addition of the whiskey at the end added a nice British touch.  I will add more next time to make the flavour a little stronger.  This will definitely be a keeper and I am eager to try to make it again with the leftover filling, but next time I will use my no fail pie crust recipe. Unfortunately since the pie crust didn’t turn out well, it affected my photos.  Therefore I am not going to share my photos.  You will have to wait until round two to see how it turned out or you can try to make it yourself!


Mincemeat Pie
Recipe From: Teri's Kitchen.com
Makes: 2 pies
 
INGREDIENTS

1-1/4 pounds lean beef stew meat
2-3/4 pounds Granny Smith apples, cored and chopped
1/3 pound beef suet, coarsely ground
3/4 pounds dark raisins
1/2 pound dark brown sugar
1/2 cup white vinegar
1/4 cup molasses
1/2 pound currants
1/2 cup apple juice
3/4 teaspoons ground cloves
3/4 teaspoons ground nutmeg
3/4 teaspoons ground allspice
3/4 teaspoons ground cinnamon
1/2 cup bourbon or rum, divided
Pastry dough for two double crust pies
Directions:
1. Place stew meat in 2-quart pot; add water to cover. Bring to boil, cover, reduce heat and simmer for 1hour or until tender. Drain and put through a meat grinder or into a food processor until a coarse grind.


2. Place the ground meat and the remaining ingredients, using only 1/4 cup of the liquor, in a 4-quart pot. Stir and bring to a simmer. Cover and cook gently for 1 hour, stirring occasionally. Remove from heat and allow to cool. (Can be made several days ahead and refrigerated, or frozen for several months.)


3. Roll out one-quarter of the pastry dough and place it in a 9-inch pie pan. Place one-half of meat mixture into pie shell. Roll out another quarter of the dough and place on top, crimping it with the bottom crust to seal. Put a hole in the center of the top crust to allow steam to escape while baking. Repeat with the second pie, or freeze the meat for future use. Bake in preheated 375° F oven for 1 hour or until brown and bubbly. Place pie on a cooling rack. Using a funnel, pour in the remaining 1/4 cup bourbon or rum. Tilt pie back and forth to incorporate. Serve warm.


.