Search This Blog

4/30/2010

The First Treasure From the Garden: Asparagus

Yesterday I started my first day of work at my new employer, J&B Ketcheson Asparagus Farm, which is a local operation run out of a local’s garage in Frankford, Ontario. It is located a hop, skip, and a jump away from my house, so close that I can walk up the road to get there. I arrived a little early and met the owner, Jack Ketcheson, who is easily pushing 85-90 years old and running the place like a young lad! He showed me the ropes and I began my day by taking the wheelbarrow down to the field and picked up several crates of freshly picked asparagus. When we returned, there was already a short line of customers waiting and the sign to say that the farm was open for the season wasn’t even posted yet! People stalk out this farm because it is the freshest stuff around and practically the only thing growing in Ontario at this time of year, with the exception of the small amount of rhubarb that they have for sale as well.


My day continued by washing asparagus and then bringing it back into the garage. From here the asparagus is loaded individually onto a conveyor belt and sent through a sharp blade which cuts off the woody purplish ends of the stalk. Then it is sorted according to grade and thickness and packaged in pound and five pound bundles. Each bundle is placed in a container with a few inches of water in it and then rests inside a cooler until it is sold. Most of the asparagus doesn’t even make it to the cooler because it is sold almost as soon as it is bagged! I kid you not, you can’t get anything fresher than the asparagus grown here.

The focus of my blog obviously is going to be asparagus because I am bringing home at least 5 pounds of the stuff every other day and because it is the seasonal veggie around these parts. Since rhubarb is also up now I will include some rhubarb recipes as well.

The first day I brought home a huge shopping bag full of the “curlies,” which is a fancy term for the rejects or the stalks that are not “pretty” enough to sell. The taste is not sacrificed by any means, totally cosmetic. Even vegetables face the same torment as people… what a harsh life. The recipe below is best served with the freshest asparagus you can find, uncooked, just washed. Enjoy and feel free to post/suggest any recipes you might have as well!
Sour Cream Horseradish Dip
Recipe From: Ptitchef.com
Makes: 1/2 cup of dip

Ingredients:
1 to 2 pounds asparagus, trimmed
250 mL sour cream
60 mL bread crumbs
20 mL garlic scape, minced (or 1 glove garlic, minced)
20 mL horseradish
pepper to taste

Instructions:
1. Combine the ingredients for the dip together in a medium bowl.
2. Serve with the asparagus.

The recipe below is best when the asparagus is quickly blanched, but be careful not to overcook it! We ate it as a side for barbequed Italian sausage and it was delicious! It is best when given ample time to chill allowing for the flavors to blend. I would also recommend adding another squeeze of lemon juice before serving!


Asparagus with Cherry Tomatoes
Recipe From: Simply Delicious
Makes: 6 servings

Salad Ingredients:
1 pound of asparagus washed and cut into 1 inch pieces
1 cup sliced cherry tomatoes
1/4 cup chopped red onion
1/4 cup diced mozzarella cheese
Fresh basil sliced (I used 1 TBS dried)

Dressing Ingredients:
1/4 cup olive oil
1 TBS balsalmic vinegar
1 clove garlic minced
1 TBS lemon juice
1/2 tsp Dijon mustard
Salt/ pepper to taste

Directions:1. Wash asparagus and blanch for 3 minutes in boiling water. Immediately rinse with cold water.
2. Mix asparagus, tomato, cheese, onion, and basil.
3. Whisk dressing ingredients and pour onto veggies.
4. Chill until serving time and add another splash of lemon juice before serving.

4/12/2010

Cheesy Beer Bread


It was a rainy afternoon and I was in need of a project, so I scoured the pantry and the fridge to see what I could come up with for a dinner treat. We were having pasta for dinner with honey garlic sausage delivered from the Ponderosa Farm down the road. Therefore I was thinking bread to soak up the sauce. I looked through my cookbook and found a recipe that I have put off trying for some reason unknown to me because it sounds fabulous, Cheesy Beer Bread. Since I am such a nice wife, I thought I would ask my husband what he thought about the idea. I don’t know what I was thinking to ask a man if something that had cheese and beer in it would be something to question, but anyway! I went straight for the cold room and grabbed a can of Alexander Keith’s Red Amber Ale, brewed in Halifax, Nova Scotia. I have recently taken a liking to this brew and I thought it would be a good complement to the herbs called for in the recipe.

As I was preparing the dough, I could not believe how simple it was to put this bread together. No kneading required! The most time consuming part was grating the block of cheddar from the Ivanhoe Cheese Factory down the road! It would have been easier to have used already shredded cheese, but when I get a chance to support the local businesses I do. I followed the recipe exactly as stated, but didn’t need to add the water because the dough was moist enough. I sprinkled a heavy sprinkle of cheese on the top just so there would be extra “crispy” cheese on the side of the pan for a nibble later. Ok so I said it one of my weaknesses..crispy cheese bits! The aroma of the baking bread filled the house within a matter of minutes! Making this recipe requires a lot of pacing back and forth and self control because I was ready to cut the knife into it immediately, but I had to wait and let it cool after removing from the oven. Darn rules of baking! I must admit this was truly a slice of heaven.. suitable for all lovers of savory bread! Best enjoyed with a can of cold beer! There will be no going back to plain old white bread with this recipe!

Cheesy Beer Bread

Recipe from: TBD

Makes: 1 loaf

Ingredients:

2 1/4 cups all-purpose flour

1 tsp baking soda

3/4 tsp baking powder

1 1/2 tsp salt

3/4 cup + 2 TBS shredded cheddar cheese

1 TBS dried thyme

1 TBS dried rosemary

12 oz beer (any kind will do, but the more flavorful the better)

1/4 cup olive oil

2 TBS water (if needed)

Directions:

1. Preheat the oven to 375 degrees. Grease a loaf pan.

2. Whisk together the flour, baking soda, baking powder, and salt. Mix in 3/4 cup cheese and the herbs.

3. Add the beer and mix until combined. Mix in the olive oil until there is no more dry flour. If there is, then mix in the water.

4. Pour the batter in the loaf pan and sprinkle with extra cheese. Bake for 50-55 minutes until a tester comes out clean. Let it cool for at least 30 minutes on a wire rack.

Chicken Thighs with Carrots and Honey

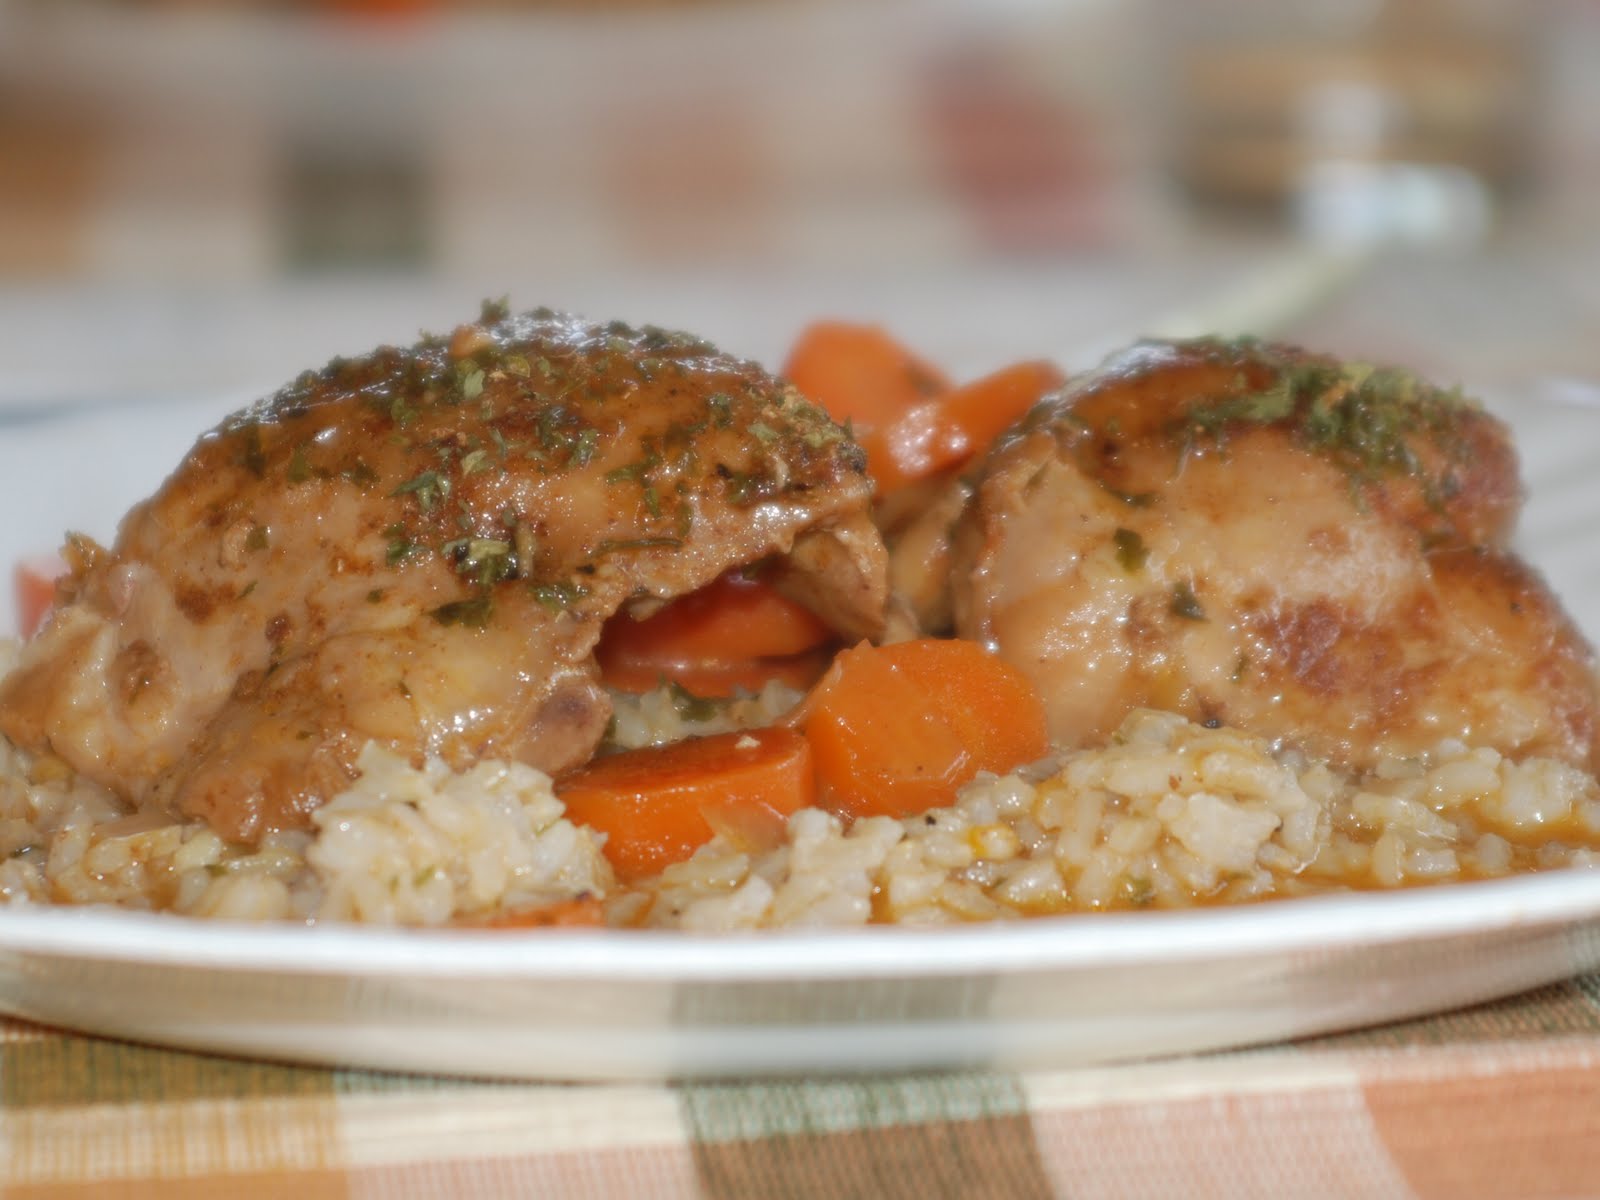
Since I am in living with my in-laws at the moment, we rotate cooking duties. Today they went up to the cottage to help open up their uncle’s cottage, so I gladly offered to make dinner. I had just perused the new recipes on by favorite food blog, Love and Olive Oil, and noticed that the newest recipe Chicken Thighs with Carrots and Honey sounded delicious. It just so happened that the fridge was stocked with carrots that needed to be eaten sooner than later and there was a pack of chicken thighs in the freezer. Bingo, we were going to eat well tonight.


I made a few substitutions to the recipe. I used boneless, skinless thighs instead of bone-in, skin-on thighs. Fresh cilantro at this time of year is not possible, unless it is flown in from some exotic corner of the world, therefore I omitted it and used dried coriander instead to finish off the dish. I also jazzed up the sauce by adding some buckwheat honey bought from a local farm. It made for a tasty sauce. I am a big fan of mixing sweet and savory spices in a meat recipe and I found that the combination of cinnamon and paprika added for a powerful, but delightful blend of spices. I served the meal over brown rice seasoned with salt, pepper, and a tablespoon of butter. Overall, I was very satisfied with this recipe and I will definitely be making this again!

Roasted Chicken Thighs with Carrots and Honey

Recipe from Epicurious
Makes 4-6 servings

Ingredients:

8 small chicken thighs with skin and bone (2 1/2 to 2 3/4 lb total), trimmed of excess fat

2 teaspoons salt

1 1/4 teaspoons paprika

3/4 teaspoon cinnamon

1/2 teaspoon black pepper

1 1/2 tablespoons olive oil

1 large onion, halved lengthwise, then cut lengthwise into1/4-inch-wide strips

1 lb carrots (6 medium), cut diagonally into 1-inch pieces

2 tablespoons minced garlic

1/2 cup water

1/4 cup fresh lemon juice

2 tablespoons mild honey

1 tablespoon finely chopped fresh flat-leaf parsley

1 tablespoon finely chopped fresh cilantro

Directions:

1. Pat chicken dry. Stir together 1 1/2 teaspoons salt with paprika, cinnamon, and pepper and rub onto chicken.

2. Heat oil in a 12-inch heavy skillet over moderately high heat until hot but not smoking, then brown chicken in 2 batches, turning over once, about 10 minutes per batch. Transfer chicken as browned to a plate.

3. Discard all but 3 tablespoons fat from skillet, then add onion and carrots. Sprinkle with remaining 1/2 teaspoon salt and pepper to taste and cook over moderate heat, stirring occasionally, until onion is softened and beginning to brown, 8 to 10 minutes. Add garlic and cook, stirring occasionally, 1 minute.

4. Return chicken, skin sides up, to skillet, nestling it into vegetables. Stir together water, lemon juice, and honey until blended and add to skillet, then cook over moderately low heat, covered, until chicken is cooked through and carrots are tender, 25 to 30 minutes. If necessary, skim fat from sauce, then add salt to taste. Sprinkle with herbs just before serving.

4/08/2010

Maple Glazed Cookies


Ok so it has been a really long time since I have posted something new but I swear I have good reasons. Relocating from overseas to live in the land of Oh Canada has been hard work. All of the tedious things that we have been putting off for the past few years while living in Korea have come back to haunt us. Now that we are settling down, I am starting to get back into the groove of cooking. My mother and I have a pretty good thing going on sharing the cooking since we are living temporarily with my in-laws. It has been really fun to experiment again with cooking tools that are so essential to many but have been pretty much non-existent for us during the past few years. Enough of the storytelling and onto the real reason to read this blog…finding new recipes that are delicious and fairly simple to make.

Since we arrived on Fish & Game about three weeks ago, Wendy’s Kitchen Aid mixer has been staring at me every morning as I pour my cup of coffee. It took me a little while to take up the courage to ask her if I could help myself to the ingredients in her pantry and more importantly work some magic with her beloved mixer. Once I saw a few extra bottles of the syrup that she brought to our wedding, freshly bottled from the Sugar Shack down the street, an idea came to mind. I wanted that syrup to satisfy my sugar rush and I immediately thought of cookies. I ran to the internet and searched for a way to incorporate an ungodly amount of maple syrup into a cookie and that is when I came up with the recipe for the Glazed Maple Cookies below.

I was in heaven experimenting with the mixer and probably more excited knowing that we have one waiting in storage for us for when we get a place of our own. The best part was that the list if ingredients was so simple! Now I normally make eggless cookies since my husband is allergic to eggs. But recently, he stated that he would like to try to incorporate eggs back into his diet to test to see if the allergy had faded over time. I figured this would be a good tester since it only required a minimal amount of eggs. The dough mixed together beautifully and I used a glass to flatten them onto the baking sheet. The directions said that they would crack a little around the edges to make for an old-fashioned look. This did not occur with my batch, but I got over that fast because as long as the taste would not be affected it was only trivial. Almost instantly, my kitchen was filled with the scent of fresh maple. I think the best part of these cookies was that the syrup was produced only a stone’s throw away from the house. After the cookies cooled, I topped them with the syrupy glaze, which I soon found out that I should have doubled the recipe for the glaze because there was barely enough for all of the cookies. The recipe called for the cookies to be sprinkled with salt after the glaze was drizzled on top, I used sea salt and that did the trick beautifully. The cookies were excellent and not overly sweet. They are definitely worth the try!

Glazed Maple Cookies

Recipe from Sparkling Ink

Makes 25-30 cookies

Ingredients

{ cookie dough }

- 1 1/2 cup (3.6 dl) flour

- 1/2 teaspoon salt

- 1/2 cup (1.2 dl) butter, room temp

- 1/2 cup (1.2 dl) sugar

- 1/4 cup (0.6 dl) maple syrup

- 1 egg yolk

{ topping }

- 1/4 cup (0.6 dl) maple syrup

- coarse salt (such as Maldon)

Directions:

1. Combine flour and salt. In a separate bowl, beat soft butter and sugar until light and fluffy using an electric mixer. Beat in maple syrup and egg yolk until even. Reduce the mixer beat on low, and gradually add in the flour mixture. Mix until completely combined and crumbly.

2. In your hands, form little balls from the dough around 1 1/2 inches (3.5 cm) in size. Place them on two baking sheets lined with parchment paper around 2 inches (5 cm) apart. Flatten the cookies using the bottom of a glass or mug. (I like to use an espresso cup, it's the perfect size!) Bake the cookies at 350 F (175 C) for 12-14 minutes until the edges turn slightly golden.

3. While the cookies are cooling, prepare the glaze. In a small pot, bring maple syrup into a boil and simmer until it has reduced to about 3/4 of the original amount. Spoon the thickened maple syrup on top of the cookies and sprinkle with coarse salt. (I absolutely love Maldon salt crystals.) Let the glaze set for a few minutes before serving.

2/18/2010

Love and Olive Oil Giveaway

Check out this giveaway for some cool notebooks that could be used in a variety of ways!
http://www.loveandoliveoil.com/

2/17/2010

Farewell Asia Cupcakes

A few weeks back I found a recipe that included an interesting combination of ingredients to say the least: chocolate and wasabi, and since I am departing from a four and a half year stay in Asia, I figured now is a perfect time to give this recipe a whirl as it combines flavors that allow me to reminisce of my stay here. Being that I am a pretty daring eater and will try just about anything at least once, I became very intrigued. The best part was that the combination of ingredients took place in the form of a cupcake. These might actually be my last batch of cupcakes for quite some time, so I took an extra long time to make them. I had a feeling these cupcakes were going to turn out really good or really bad.

I started off by following the recipe exactly as posted since I am still learning the science involved in creating a fantastic cupcake. When I got to the adding wasabi part, I added the one tablespoon like mentioned and tasted nothing. I added one more and still no hint of wasabi. I mean if I was going to experiment with these flavors I wanted it to be known. So I continued to add tablespoon by tablespoon until I looked into my packet of wasabi powder and realized that there was only a little left so I just dumped it all in. Since I made it into a paste first, as a means to kick up the heat, before adding it to the batter, it became a little difficult to mix it all into the batter evenly. So basically all I am saying is watch out when you bite into one of these babies because you might get a mini wasabi ball!

Usually I can’t wait for the smell of a batch of cupcakes to fill up my house, but there is something about the smell of cooking wasabi that is not very desirable. But it could just be that I had my fair share of wasabi as I tasted for heat while preparing the batter… who knows. While they were cooling I prepared the ginger butter cream icing which turned out to be amazing! I couldn’t wait any longer and had to break into one. As they cooled I noticed that all of the cupcakes sunk in the middle and appeared as if someone had put their fist in the center of them. I have never had that happen following any of the recipes from love and olive oil, but I am going to give the credit to the excessive amount of wasabi and the slight level of intoxication that existed while making these. I had plans to bring these to work to share but I am not sure if I can due to their utterly unappetizing appearance. As far as the taste, the first bite was delicious but as I continued to try more of the cupcake the amount of wasabi became a little too much. I agreed to stay away until the morning and try again before sharing with others. When I tried them again in the morning I was pleasantly surprised, I think all of the flavors had time to cool properly and blend together as they tasted delicious with only a trace hint of wasabi. But I do know that somewhere in the middle of my cake, (as I ran out of cupcake liners midway so I put the rest in an 8x8 pan) someone will get a nice little surprise of fire. Happy eating!

Black Pearl Cupcakes
Recipe from: www.loveandoliveoil.com
Makes 12 cupcakes.

Ingredients:
1 cup coconut milk
1/3 cup canola oil
1 teaspoon vanilla extract
3/4 cup sugar
1 cup all-purpose flour
1/3 cup cocoa powder
3/4 teaspoon baking soda
1/2 teaspoon baking powder
1/4 teaspoon salt
1/4 teaspoon ground ginger
1-2 tablespoons wasabi powder (to taste)

For Frosting:
1/2 cup butter or margarine, room temperature
2-3 cups confectioners’ sugar
2 tablespoons soy creamer or heavy cream
1 teaspoon vanilla extract
1 teaspoon ground ginger, or to taste
Black sesame seeds, for topping

Directions:
1. Preheat oven to 350 degrees F. Line muffin pan with paper liners.

2. Whisk together the coconut milk, sugar, oil, and vanilla extract until incorporated. In a separate bowl, sift together the flour, cocoa powder, baking soda, baking powder, salt, ginger, and wasabi. Make a well in the center of dry ingredients and pour in coconut milk mixture. Stir until just smooth (do not overmix). Take a quick taste of the batter, and add more wasabi if you feel it is needed.

3. Pour into liners, filling each with 3 tablespoons of batter (cups should be no more than 2/3 full). Bake 18-20 minutes, or until a toothpick inserted into the center comes out clean. Transfer to a cooling rack and let cool completely.

4. For frosting, cream butter until smooth and fluffy, 2-3 minutes. Add 1 cup powdered sugar and beat until combined. Mix in vanilla, ginger, and cream. Continue adding sugar, 1/2 cup at a time, mixing well after each addition (depending on the temperature of your butter, you may need more or less sugar/cream to achieve the proper consistency). Continue beating until light and fluffy, about 3-5 minutes. Spread or pipe onto cooled cupcakes. Sprinkle with black sesame seeds and enjoy!

2/15/2010

Peanut Butter and Jam Cookies


Now that I am married, my husband and I sometimes do things that married people do such as attend “dinner parties.” Tomorrow we are going over to a friend’s house for dinner and my mother taught me never to go to someone’s house empty handed. With that said, it gives me an excuse to bake today. Before I decided on what to bake, I rummaged through my cupboards to see what I could concoct with supplies that we already had, since we are moving in less than 2 weeks so it doesn’t make a whole lot of sense to go all wild and crazy purchasing fun stuff for the kitchen… besides we are on a budget too as we are preparing for life once again in North America. Somehow the thought of it is just making us broke!

Today’s recipe…Peanut Butter and Jam Cookies. The idea is a combination of a traditional thumbprint cookie and a peanut butter cookie recipe. I followed the peanut butter cookie recipe which happens to be eggless and when they were finished baking I placed a small amount of jam in the center of the cookie before it cooled. I ran out of jam halfway through the recipe so I placed a small square of chocolate in the center. Score.. I used up 4 things in my pantry today making this recipe. Less to throw away next week before the move! I was very impressed with these cookies and I have a feeling that they might be my “signature” cookie for awhile. There is no way one can go wrong with a combination such as peanut butter and jam or even peanut butter and chocolate.


Peanut Butter and Jam Cookies
Recipe from: Cooks.com
Makes: 6 dozen cookies

Ingredients:

3c. flour
1 tsp baking powder
1 tsp salt
1 c. butter, room temp.
1 c. peanut butter
2 tsp. vanilla
1 c. packed brown sugar
1 c. sugar
4 TBS cornstarch
4 TBS water
2/3 c. chocolate chips (optional)


Directions:
1. Preheat oven to 350°F. Line baking sheet with parchment paper.
2. Combine cornstarch and water with a fork. Mix well and set aside.
3. Mix flour, salt, and baking powder.
4. Using electric mixer, beat butter, peanut butter, and vanilla. Beat in both sugars. Beat in half of dry ingredients into mixture. Add cornstarch and continue mixing. Add the rest of the dry ingredients.
5. Roll into a ball and press down with a fork. Sprinkle with sugar. Bake for about 14 minutes. Cool for 5 minutes,